Entrance via PMI
The PAYONE link portal offers you a standardised way to generate links for payment. It does not offer you quite as much freedom as the API (no automated transfer of data), but it does offer some other features, allows you to create links directly and send them to your customers without any development effort.
In the following sections you will find information on how to create such a link and how to get into the PAYONE Link Portal.
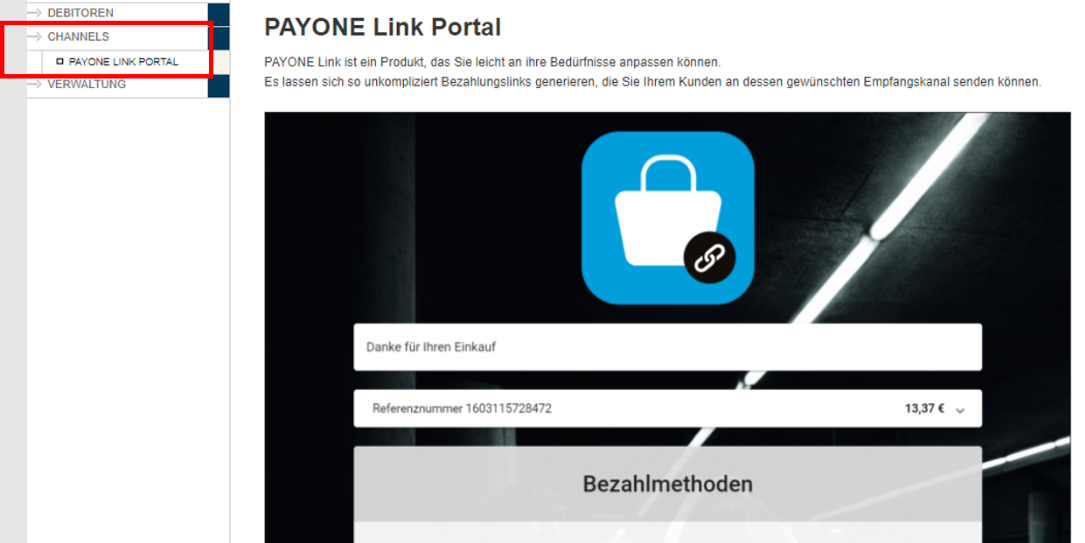
In the PAYONE Merchant Interface, access the PAYONE link via the "Channels" section.
You can now choose to navigate to the dashboard of existing links, create a new link, or review the documentation. After making your selection, you will be redirected back to the current page.
Übersichtsseite
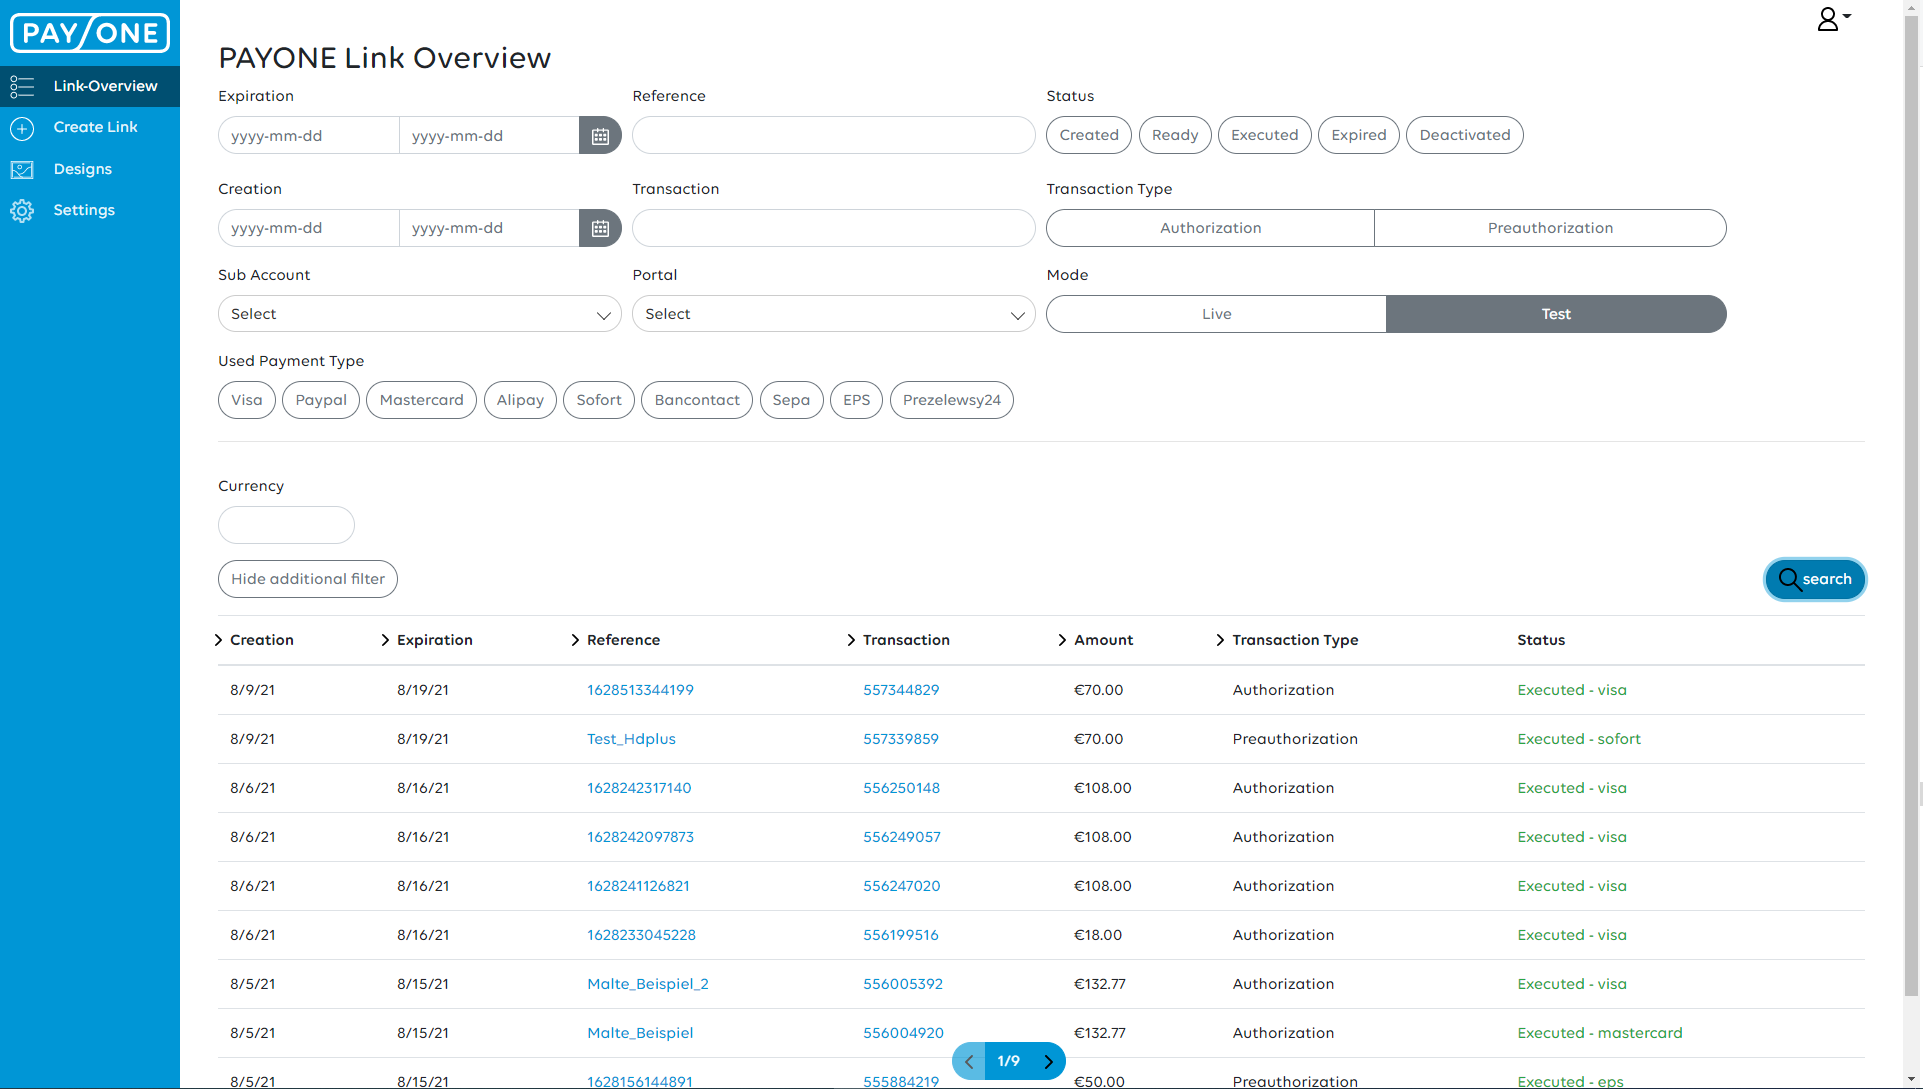
This is could also be called the landing page of the PAYONE link. Here you can see all your already created links and sort them by different parameters.
Via the displayed transaction number, which is located next to the reference of the link, you will be directed to the respective transaction in the accounts receivable management.
The following filters are available:
- Expiration and creation date
- Reference
- Status
- Transaction number
- Transaction type
- Sub-account and portal
- Mode
- Payment methods used
- Currency
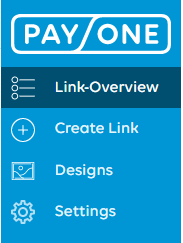
Using the bar on the left you can navigate to:
- Link overview
- Creation of links
- Designs
- Settings
The part where you currently are is highlighted in a dark blue
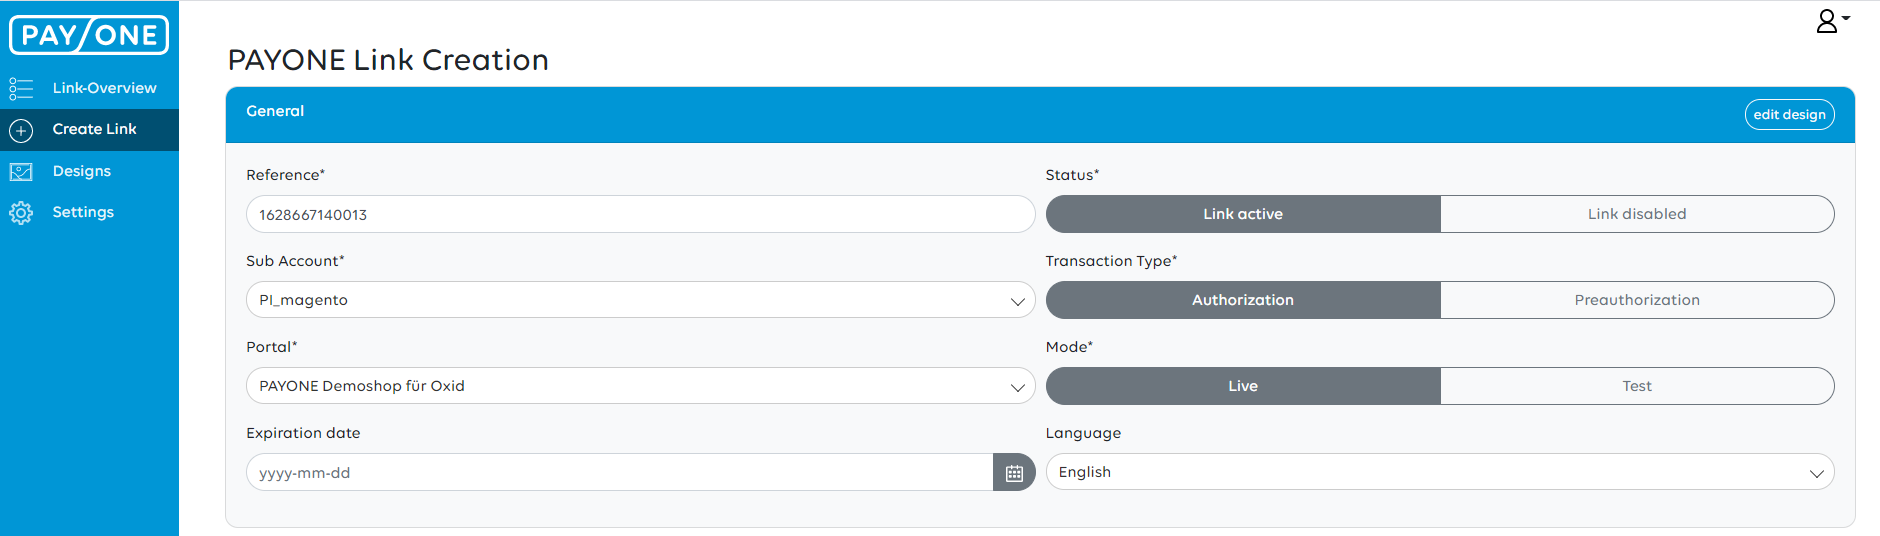
Create a new link
In order to create a link, a form must be filled out, which operates the API in the background. Not all fields are mandatory.
| Parameter | Mandatory? | Default Setting | Notes |
|---|---|---|---|
|
Reference |
yes |
timestamp |
Merchants can change the reference, nevertheless it has to be unique |
|
Sub-Account |
yes |
||
|
Portal |
yes |
It can be set as the default in the configuration. |
|
|
Transaction Type |
yes |
Authorisation |
|
|
Mode |
yes |
Live |
|
|
Language |
yes |
German |
The link is currently available in German, English, French and Spanish |
|
Expiration Date |
no |
10 days; if no date is set by merchant |
Currently available up to 335 days. However a link will be deleted 30 days after expiration or execution due to data security |
|
Status |
no |
activated |
merchants can deactivate already created links |
You can also edit your prefered link design in this area. For that click on "edit design". A description for design follows further below.
Shopping Card
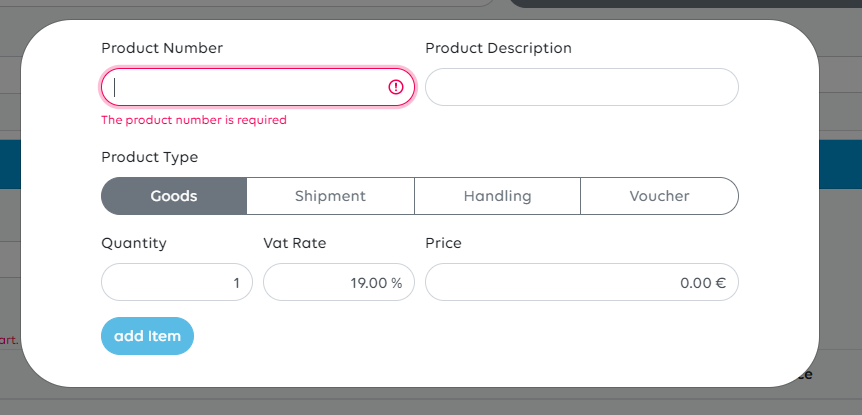
Once you click on Add item a new window will open as can be seen below.
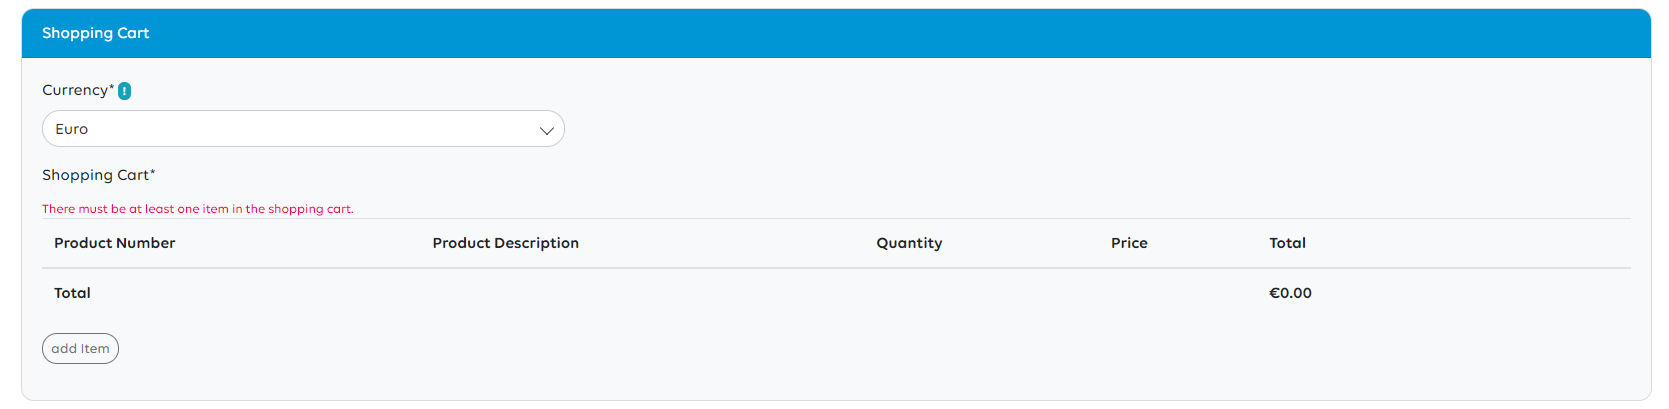
In this area you can configure a shopping cart. Necessary information will be:
| Parameter | Mandatory? | Default Setting | Notes |
|---|---|---|---|
|
Currency |
yes |
Euro |
Currency (this will be validated against the chosen portal and subaccount and provide the possible payment methods at the end) |
|
Shopping Cart |
yes |
empty |
see below table |
---end
| Parameter | Mandatory? | Default Setting | Notes |
|---|---|---|---|
|
product number |
yes |
empty |
You don´t have to list every item, it is also possible to list one item as a placeholder for one order. However it is necessary to list a product number. |
|
product description |
yes |
empty |
|
|
product type |
no |
goods |
if nothing is chosen then automatically goods |
|
quantity |
yes |
1 |
|
|
VAT rate |
yes |
19% |
This parameter can be set within the settings part |
|
Price |
yes |
0,00 |
With price the sales price, including VAT is meant. For vouchers you actively have to insert a minus. |
| Parameter | Mandatory? | Default Setting | Notes |
|---|---|---|---|
|
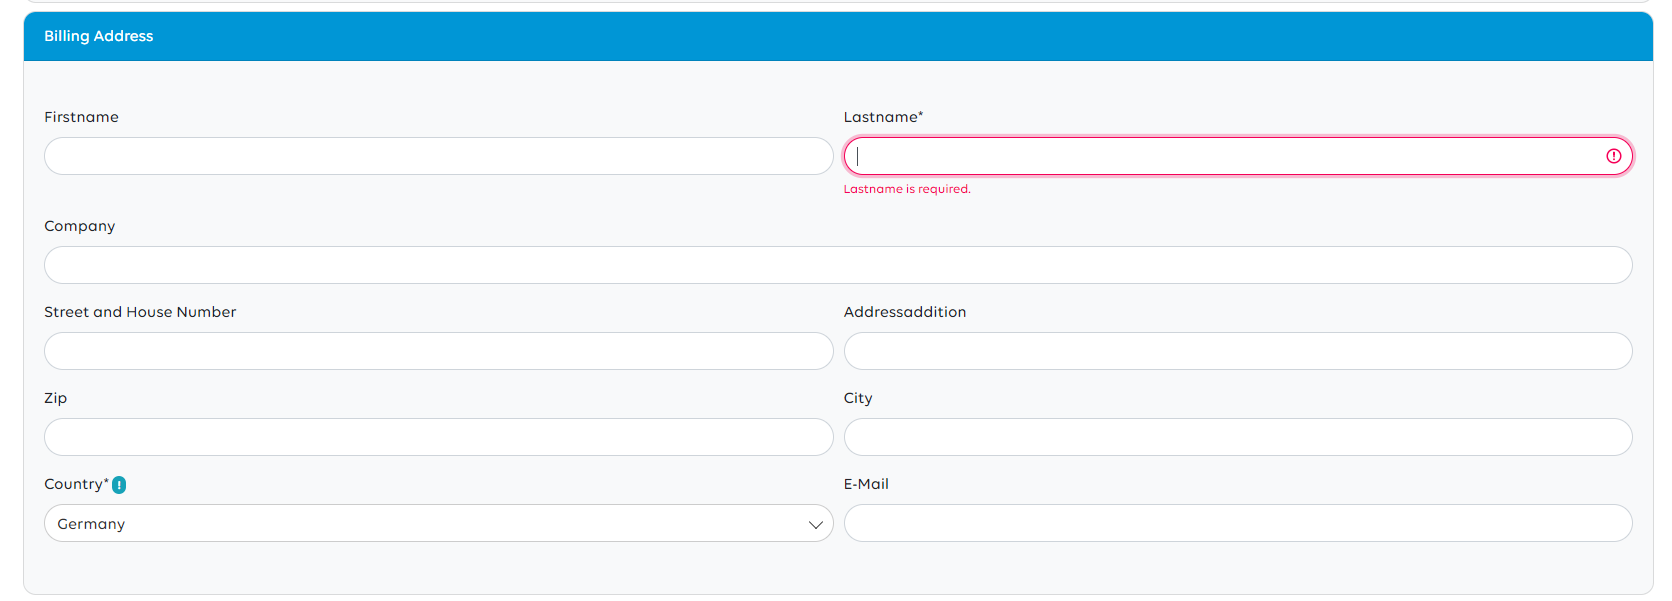
Prename/Frist name |
no |
empty |
|
|
Last Name |
yes |
empty |
Needs to be at least two letters |
|
Company |
no |
empty |
|
|
Street and Number |
no |
empty |
|
|
Address Addition |
no |
empty |
|
|
Zip Code |
no |
empty |
|
|
City |
no |
empty |
|
|
Country |
yes |
empty |
searchable, everything except GER, AUT and SUI is written in english |
|
|
no |
empty |
Shipping Address
You can add a Shipping address. For some payment methods this could be required. As this varies a lot from use case to use case please make sure to see the applicable payment method documentation.

Payment Methods
As a result you will see a variety of payment methods, resulting from the combination of portal, sub account, currency and country.

Currently around 15 payment methods are available for PAYONE Link with more methods joining in the future.
- grey payment methods - those are preselected
- white payment methods - by clicking on a pre-chosen payment method you deselct it and it turns white, click on it again and it is selected and turns back grey
- second line - those are payment methods available for PAYONE Link, but you have not activated or booked them. If you are interested in one, simply contact your sales or service person at PAYONE
After selecting your favoured payment mix, you can create the link by clicking on "create".
Link Details
If you entered all the necessary data simply click on "create". You will be forwarded to a detail page, where you can control the entered information before sending the link.
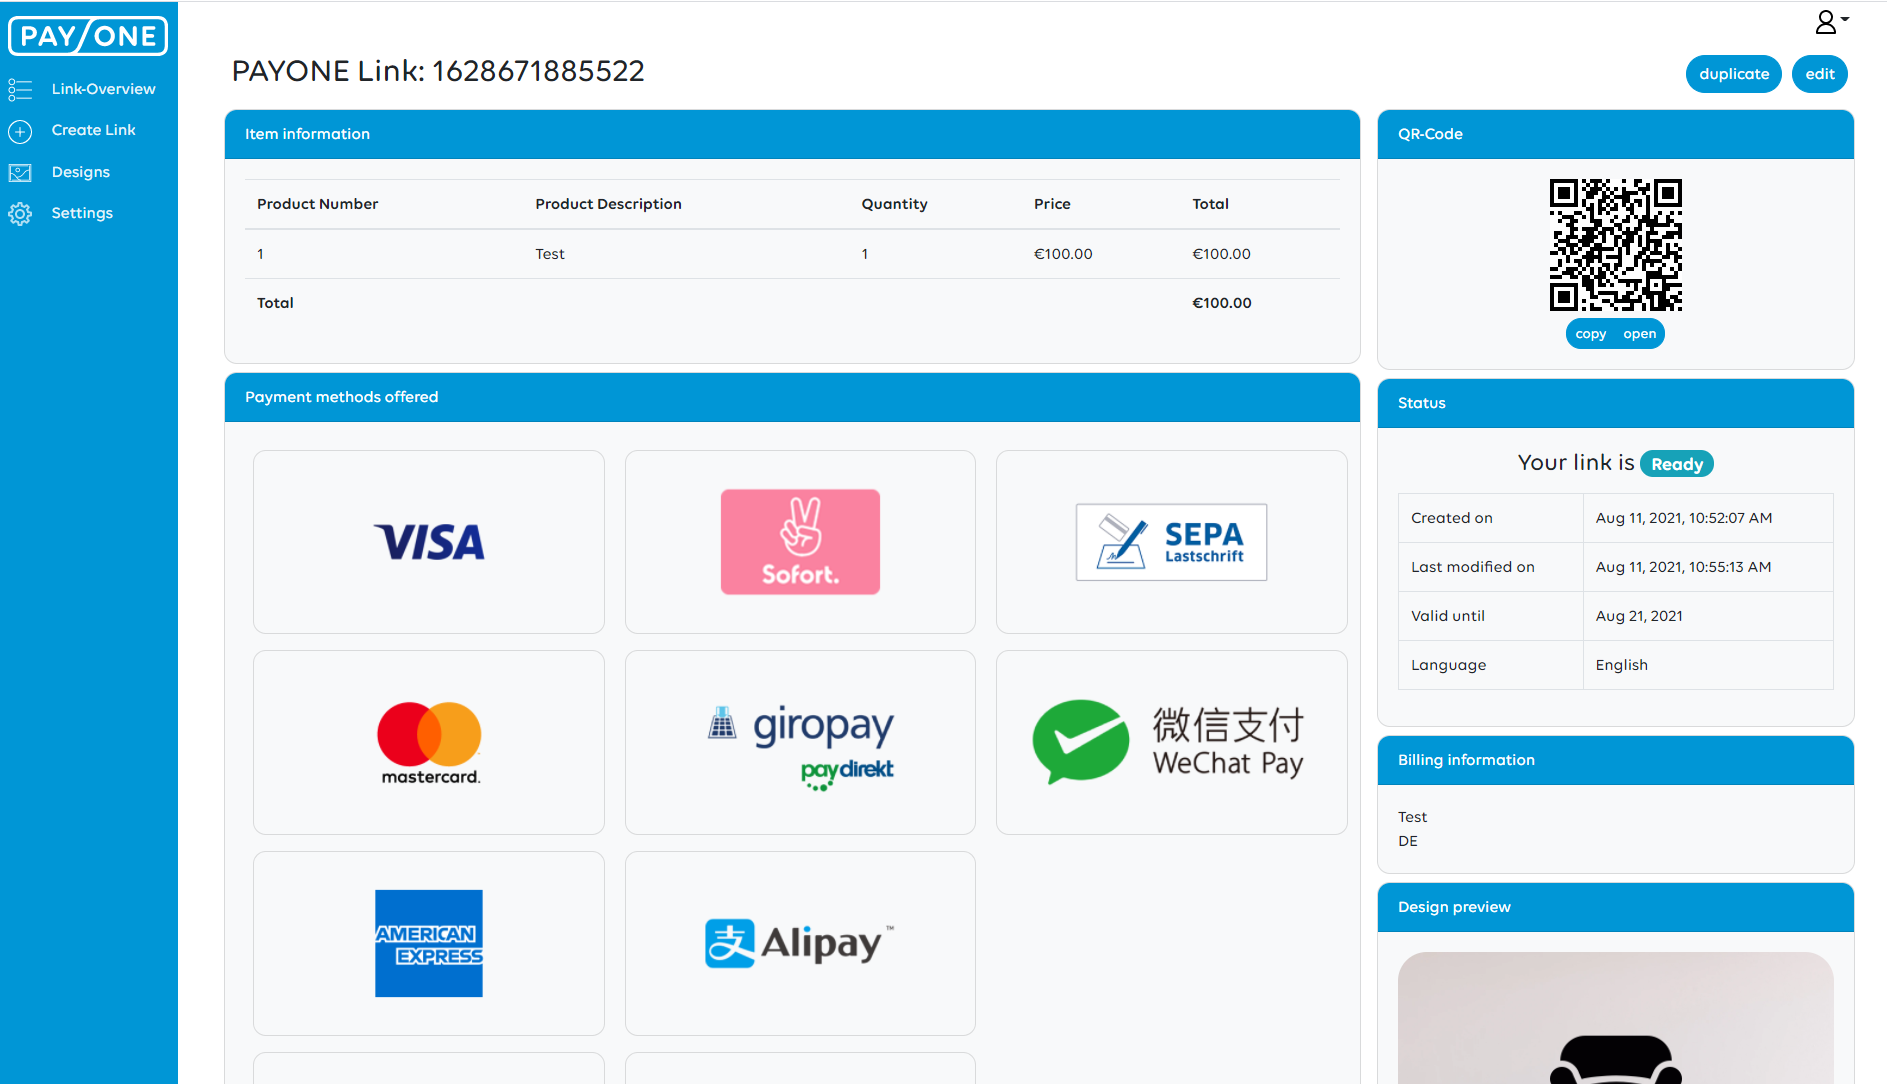
In this area you have the opportunity to check all details and send the link afterwards. Copy it and send it via social media, messenger or elsewhere.
On this page you also have the possibility to adapt the link again by clicking the button "edit" - this is possible until your customer has clicked the button "execute payment" in the link. For example you could change the design, which is shown as a previw In the right corner at the end of this page.
In addition, the PAYONE transaction number is displayed here as soon as the customer has clicked on "Execute payment". If you click on the transaction number, you will be taken to the accounts receivable management where you can see the current status of the payment.
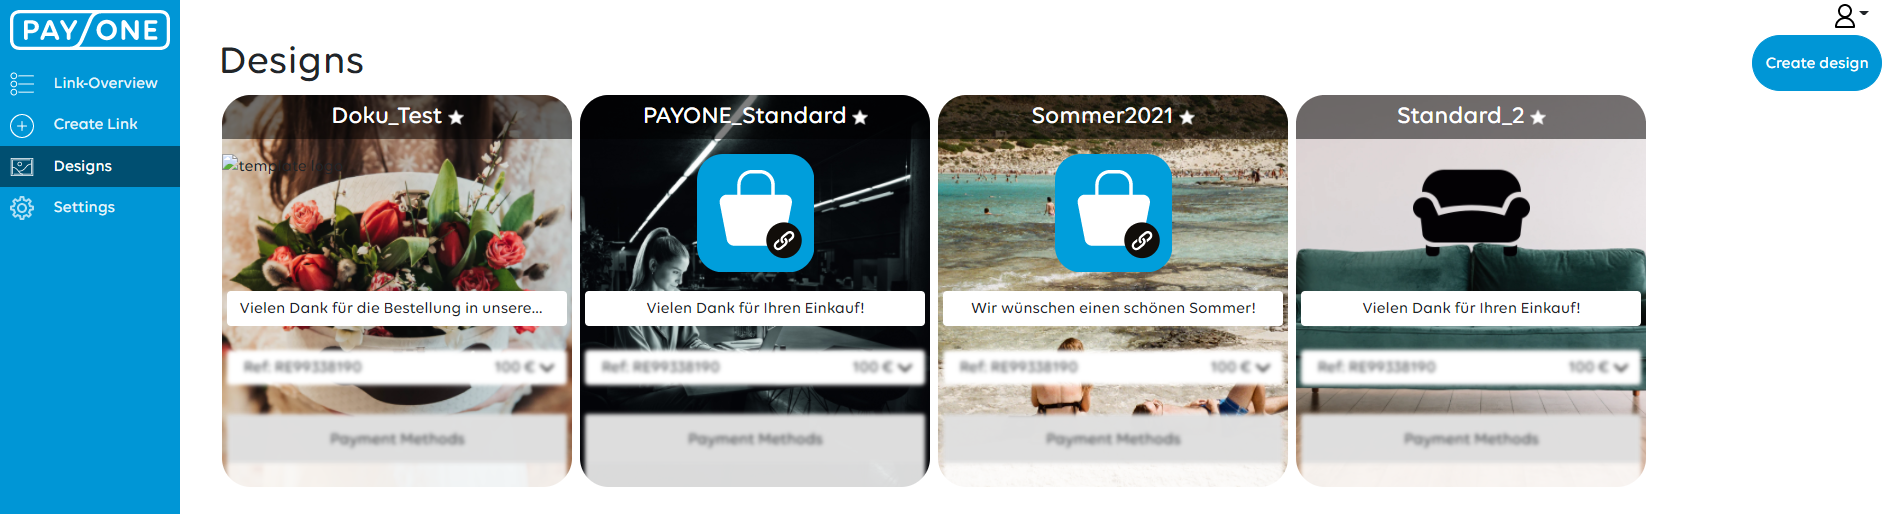
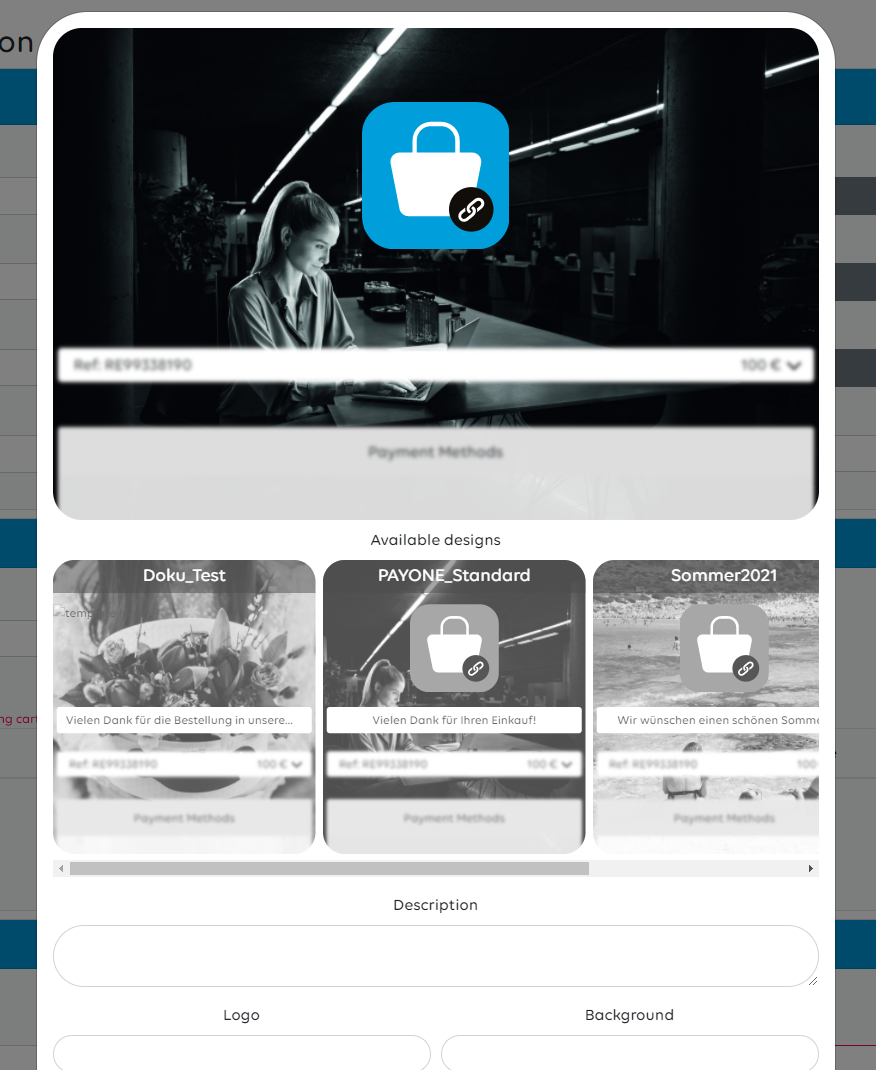
Designs
Different seasons or locations call for different designs. Therefore we implemented a dedicated designs section. You can navigate to designs via the bar on the left.
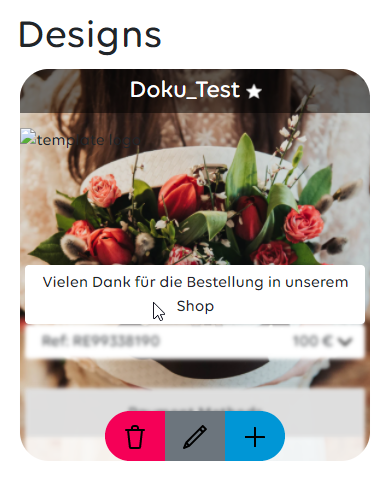
Within this section you have the possibility to create and save up to 20 different designs. if you hover over one of the design panels you have four different options:
- The trashcan allows you to delete design templates
- The pencil gives you the opportunity to edit the design
- The plus allows you to create a new link directly from this design
A new design can be created on the far right of this page via the button "create design". The star next to the design title makes this your default design
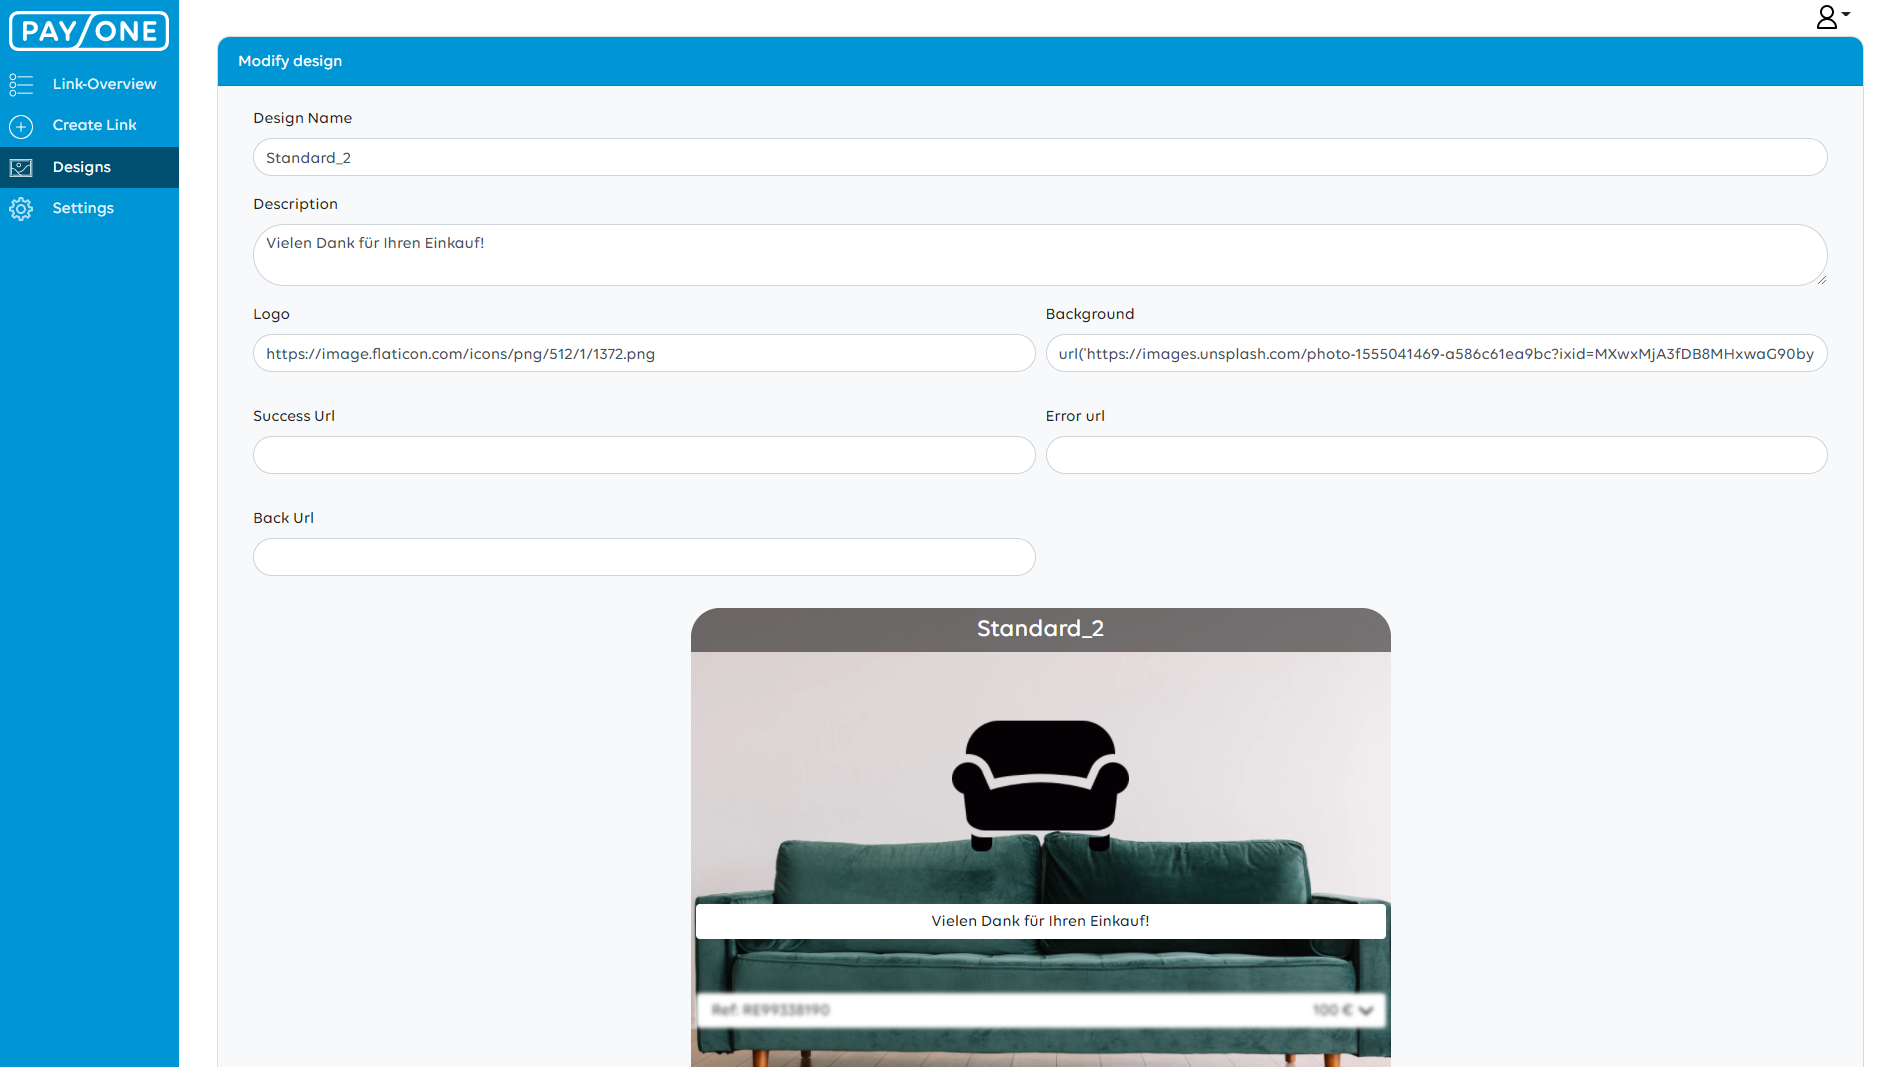
If you want to edit an existing design or create a new one, this window will be shown. Here you can set the following parameters:
| Parameter | Mandatory? | Default Setting | Notes |
|---|---|---|---|
|
Design Name |
yes |
empty |
This is the name under which you will find the design. |
|
Description |
no |
empty |
The Description will be shown to your customer in the check-out to give him an idea, what this link is about |
|
Logo |
no |
empty |
The logo needs to be a URL and is suggested to be your company logo/icon |
|
Background |
no |
A universally provided background in PAYONE Design |
The background need so be a URL and can be any pictur or moving image. |
|
Success URL |
no |
Default success page from PAYONE |
After successfully executing the payment the customer will be led to this site. This could be a site in your own shop environment or website |
|
Error URL |
no |
Default error page from PAYONE |
After unsuccessfully executing the payment the customer will be led to this site. This could be a site in your own shop environment or website, where the customer gets knwoledge how to proceed. |
|
Back URL |
no |
Default page from PAYONE |
If the customer chooses to get back to the link, afte excecuting the payment, he will be led to his URL. This could be a site in your own shop environment or website, where the customer gets knwoledge how to proceed. Additionally you could add an API here, where a new link will be created for your customer. |
After inserting the parameter click on modify design. If you want this design for all links, click on the star, as shown in the section above.
You can also edit the design while creating a new link. Otherwise your defined default design will be provided. If you did not create one, our default design will be selected (seen below).
In the "General section" (of the space "Create Link") on the right side you find a button called "edit design". Via this button a new window will pop-up, where you can edit the parameters explained before.
After changing the parameters click the button "submit design" and the design will have changed for this link.
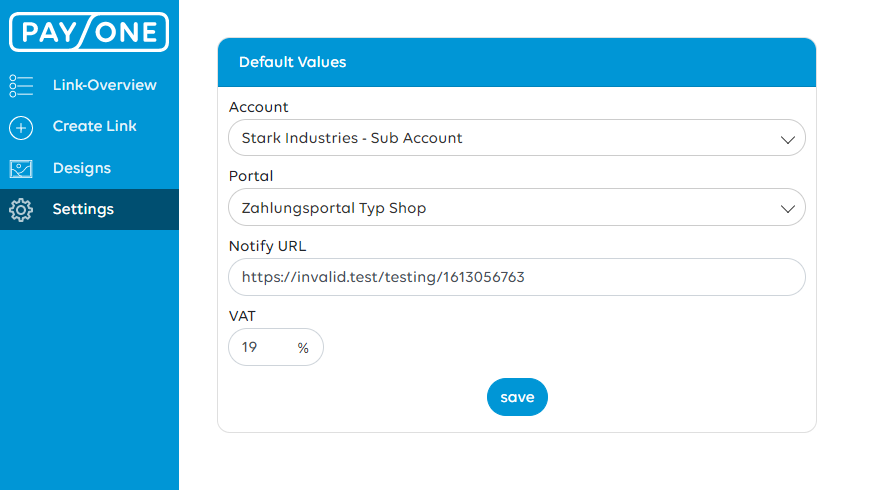
Setting
Im Bereich Einstellungen können Sie verschiedene Standardwerte hinterlegen, die dann automatisch beim Erstellen eines Links verwendet werden.