Integration
- Integration
- Plugins
- Integration Guide Shopware 6
- Integrationsanleitung Shopware 6
- Integration Guide Magento 2
- Integrationsanleitung Magento 2
- Integration Guide Shopware 5
- Integrationsanleitung Shopware 5
- Integration Guide WooCommerce
- Integrationsanleitung WooCommerce
- Integrationsanleitung Oxid 6
- Integration Guide Oxid 6
- Integrationsanleitung Oxid 7
- Integration Guide Oxid 7
- Installationsanleitung Magento 1
- Integration Guide Magento 1
- Channel-Server-API
- Server API - Preauthorization
- Server API - Authorization
- Server API - Capture
- Server API - Refund
- Server API - Debit
- Server API - Managemandate
- Server API - Getinvoice
- Server API - Getfile
- Server API - Vauthorization
- Server API - Creditcardcheck
- Server API - Getuser
- Server API - Updateuser
- Server API - 3dscheck
- Server API - Bankaccountcheck
- Server API - Addresscheck
- Server API - Createaccess
- Server API - Updateaccess
- Server API - Updatereminder
- Server API - General Interface Definitions
- Server API - checkout demo app
- Channel-Client-API
- Client API - Preauthorization
- Client API - Authorization
- Client API - Creditcardcheck
- Client API - Managemandate
- Client API - General Interface Definitions
- Client API - Createaccess
- Client API - Vauthorization
- Client API - Bankaccountcheck
- Client API - AJAX-Mode
- Client API - Redirect-Mode
- Client API - Addresscheck
- Client API - Hosted iFrame Mode
- Client API - Calculation of the HASH value
- PAYONE Link
- Channel-Frontend
- Response Handling
- Testdata
- NEW Hosted Tokenization Form
- Plugins
Introduction
Our Magento 2 plugin is regularly updated and provides a versatile, ready-to-use solution for easy online payment acceptance.
Supported Payment Methods
💳 Credit Cards
- Visa (Click to Pay), Mastercard (Click to Pay)
- American Express
- JCB, Diners Club
📱 Digital Wallets
- Apple Pay
- Google Pay
- Amazon Pay (v2)
- PayPal and PayPal Express
- PayPal v2 and PayPal Express v2
- Alipay
- WeChat Pay
- WERO
🏦 PAYONE Solutions
- PAYONE Secure Invoice
- PAYONE Secured Payments
- PAYONE Direct Debit
- PAYONE Open Invoice
- PAYONE Prepayment
🌍 Local Payment Methods
- Klarna Payments
- Ratepay Solutions
- Unzer Payments
- Bancontact, EPS, iDEAL
- PostFinance, Przelewy24
Requirements
Plugin Installation
You have 2 ways to install our plugin:
Installation via Composer
Execute the following commands in your Magento directory:
Installation via GitHub
Download the latest version directly from GitHub and install it manually in your Magento 2 installation.
Portal Configuration
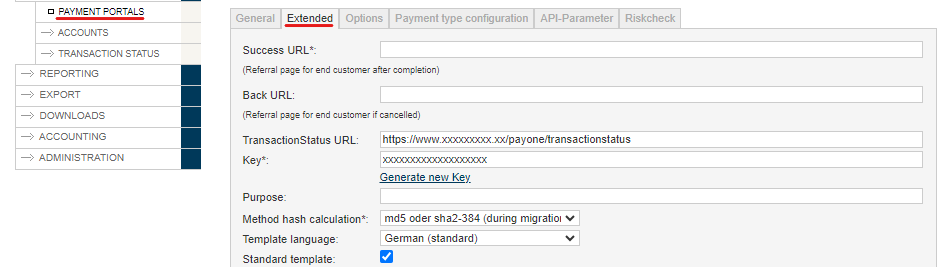
To send the transaction status to the correct address, log in to the PAYONE Merchant Interface (PMI).
Navigate to: Configuration → Payment Portals → YOUR_PORTAL → Advanced → TransactionStatus URL
Additional Response Data
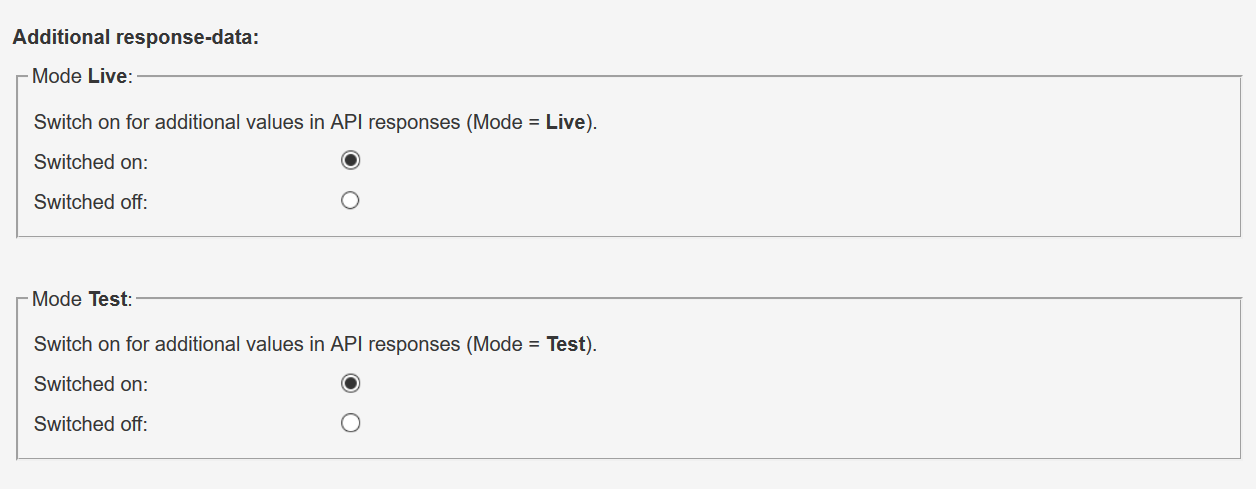
In the General settings, enable "Additional Response Data" for both Live and Test modes.
Magento 2 - Admin Configuration
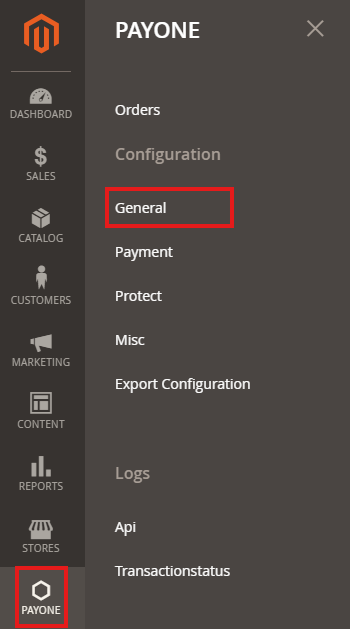
Click on PAYONE → General
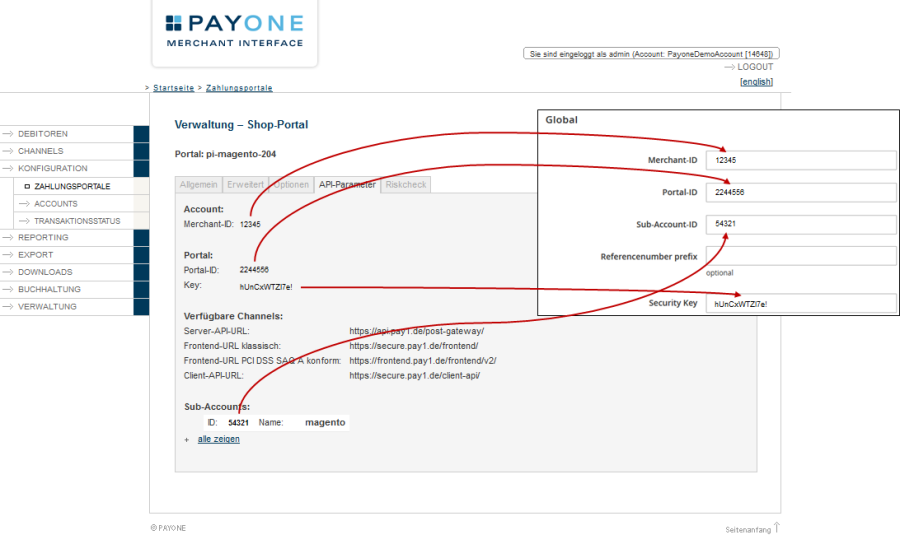
Enter Access Data
Please enter your access data from the PMI here:
Invoice Email Configuration
Indicate whether to automatically send an invoice email to the customer following a successful payment authorization:

Payment Methods Setup
Click on PAYONE → Payment
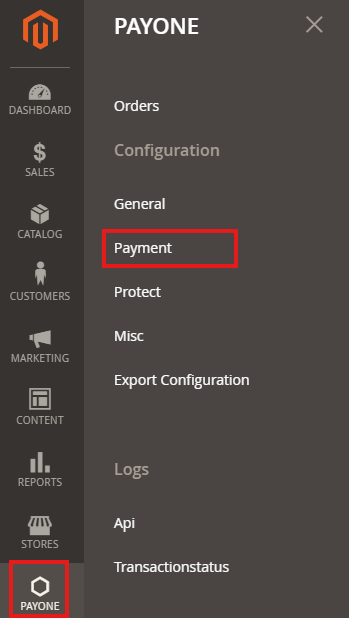
Enable/disable the desired payment types in the "Enabled" field.

Special Adjustments
Certain payment methods require special configurations. The following points are relevant only if you use these specific payment methods:
These two payment methods require their own payment portal. Please enter under PAYONE → Payment → Secured Invoice (new) or Secured Installment → Use Global Settings to "No" and set a separate portal ID.
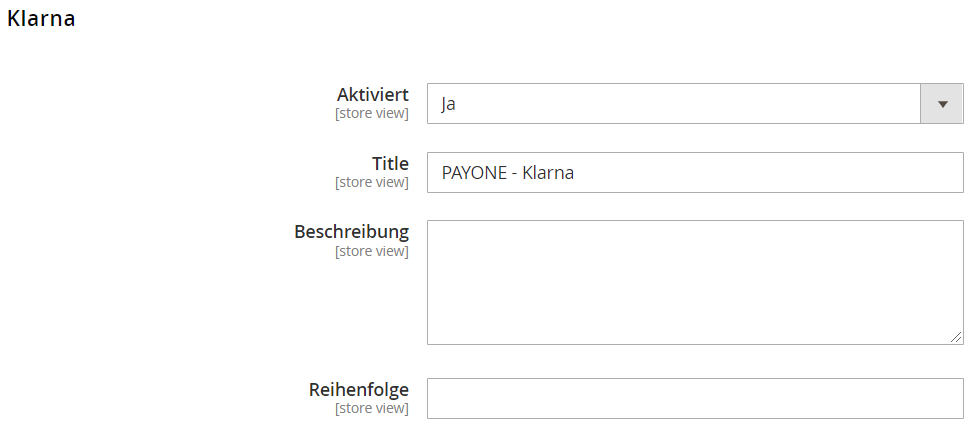
- Klarna Pay Later
- Klarna Pay Now
- Klarna Slice it
are grouped in a Klarna Base Payment method.
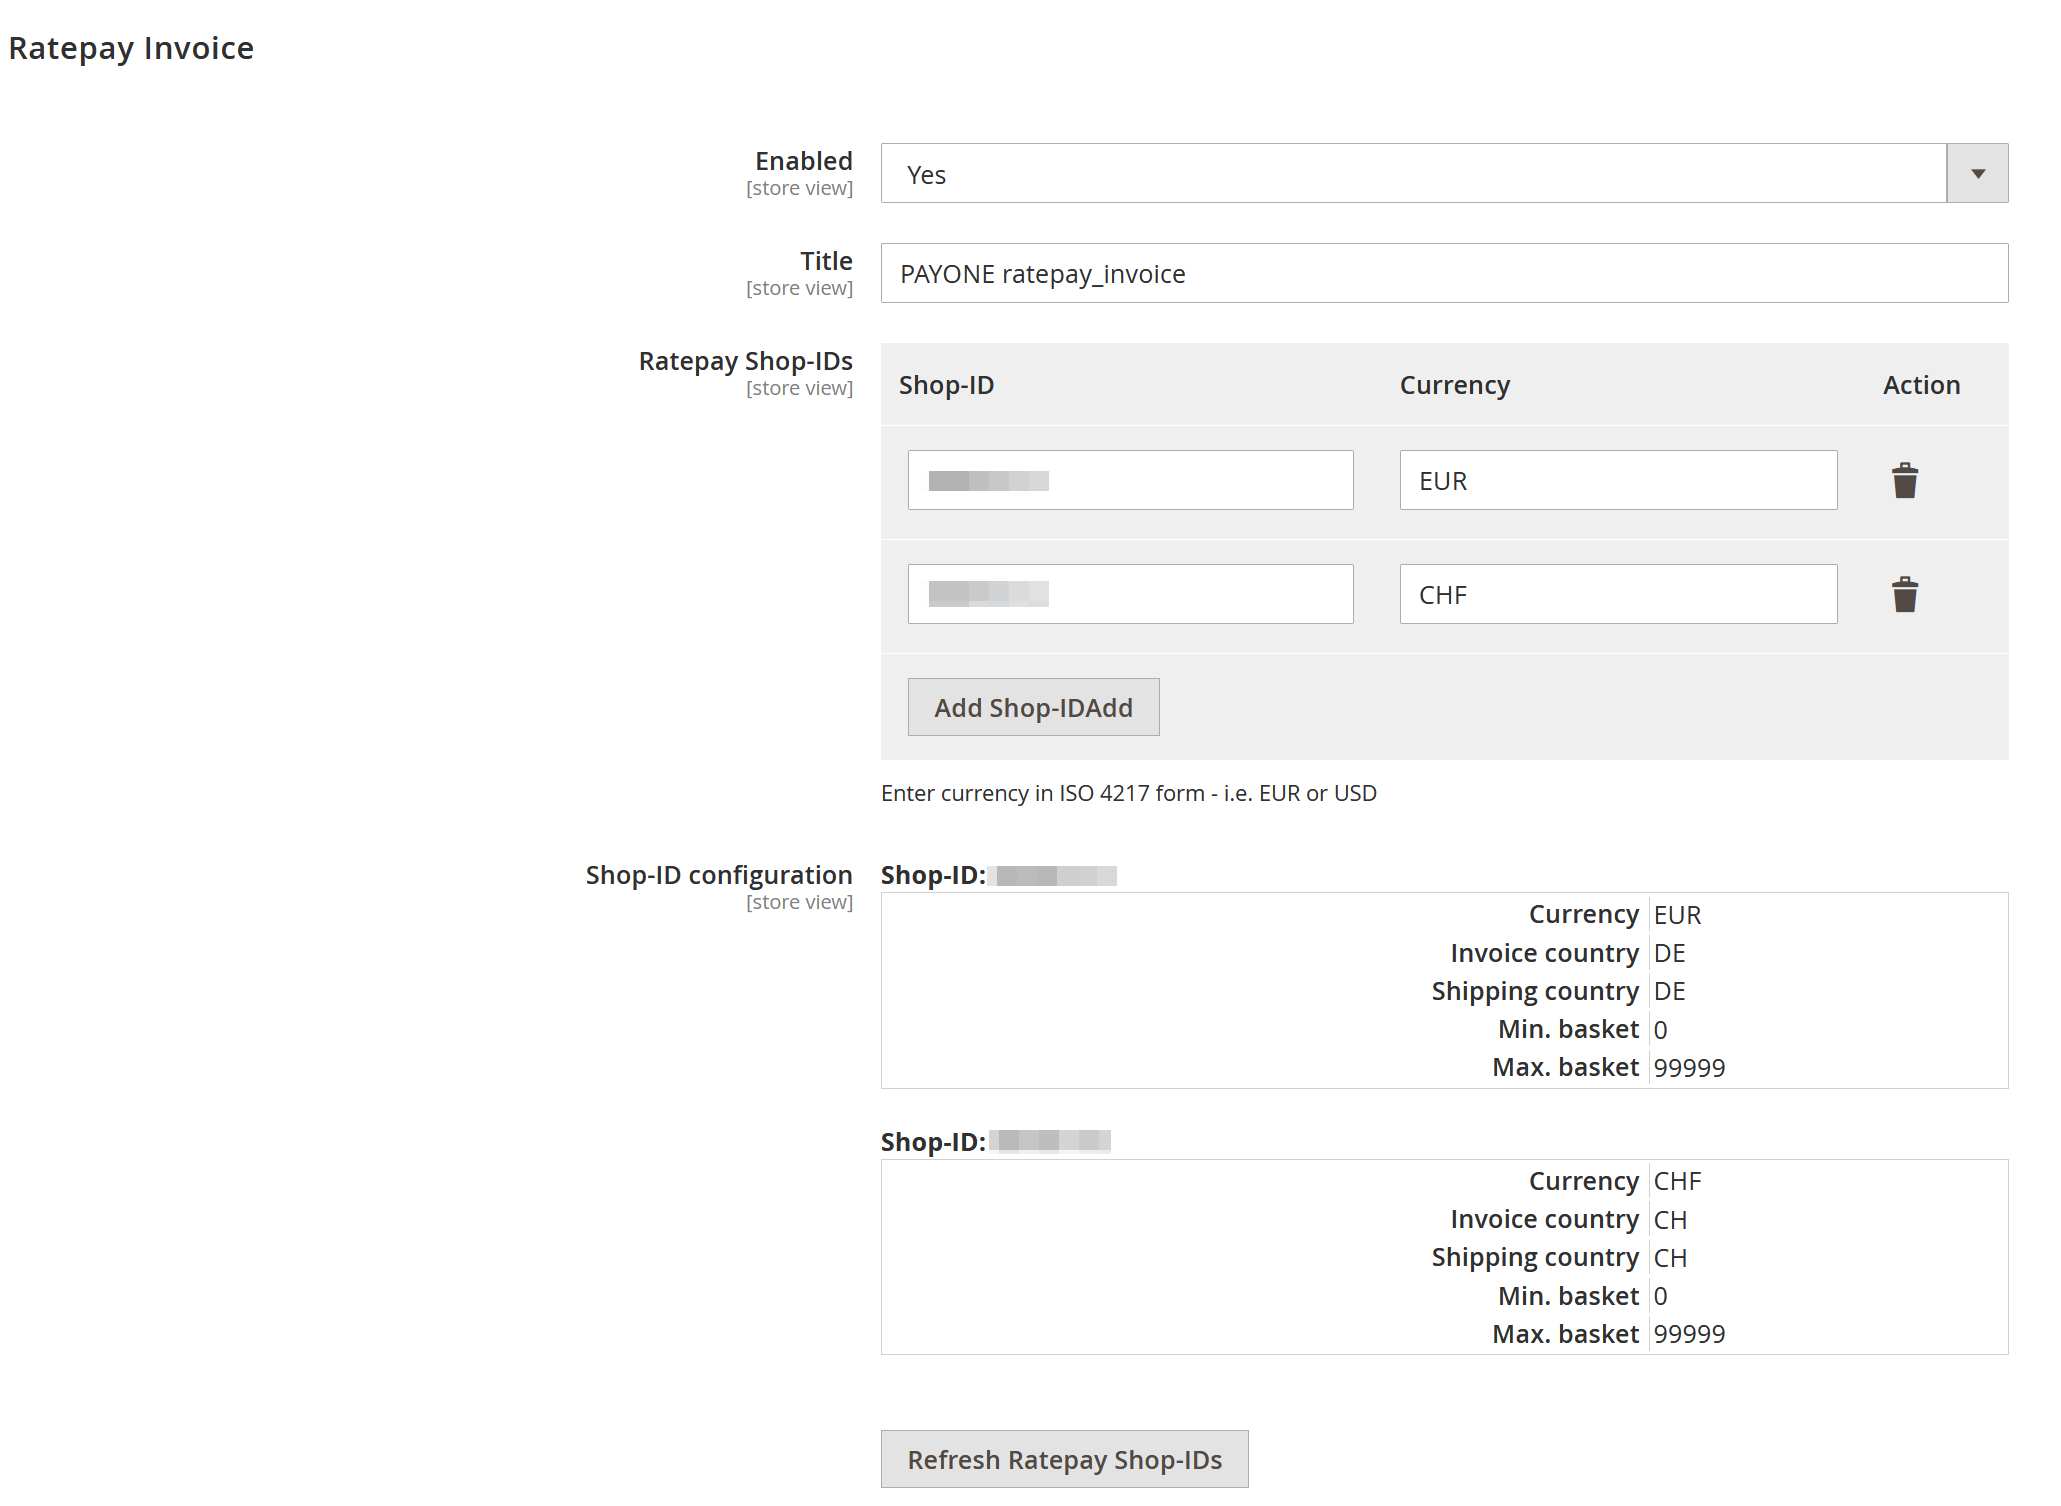
Ratepay requires the configuration of one or more shop IDs, which you will receive from Ratepay. After adding them, click "Refresh Ratepay Shop-IDs." Valid shop IDs will appear with their settings configured by Ratepay.
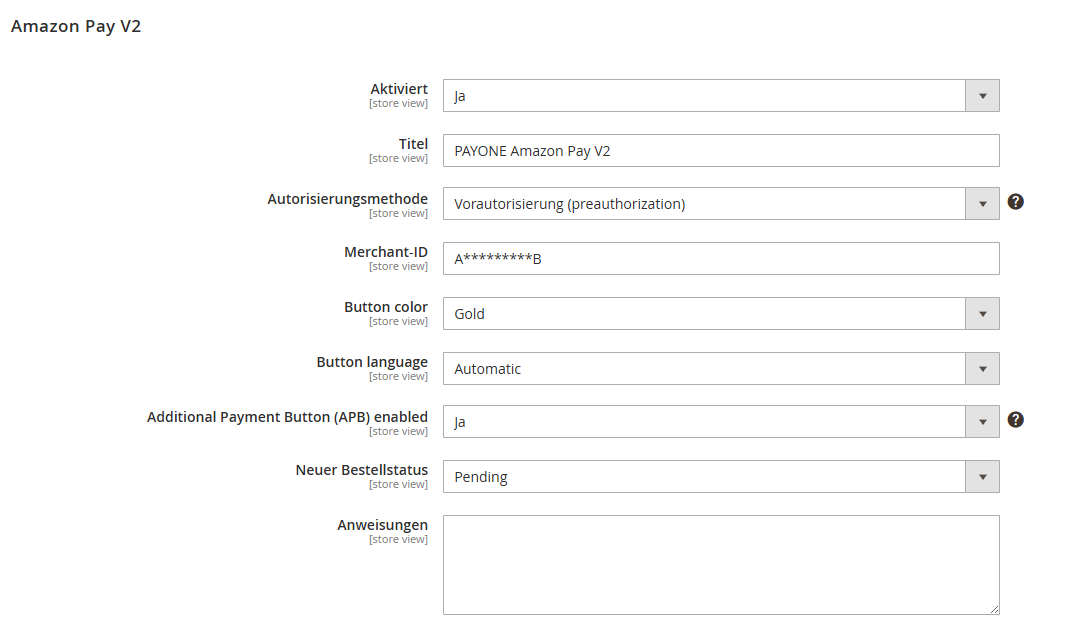
Place the Amazon Merchant ID
Please enter your Amazon Merchant ID in the payment method.

Select the credit cards you want to offer under CreditCard-Type.
Specifies whether the CVV/CVC is queried. This is only possible if the acquirer allows it.
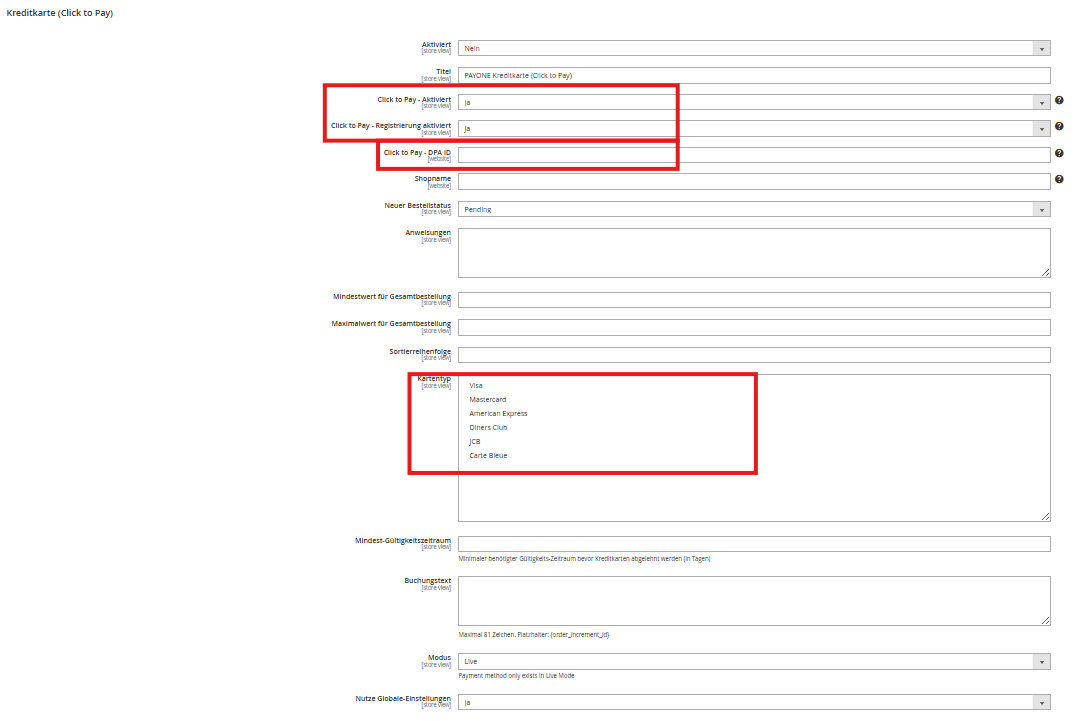
Here you can enable Click to Pay in the checkout and decide whether customers may register for Click to Pay.
The Click to Pay DPA ID is provided directly by PAYONE.
Under Card Type, select which credit card types you want to offer.
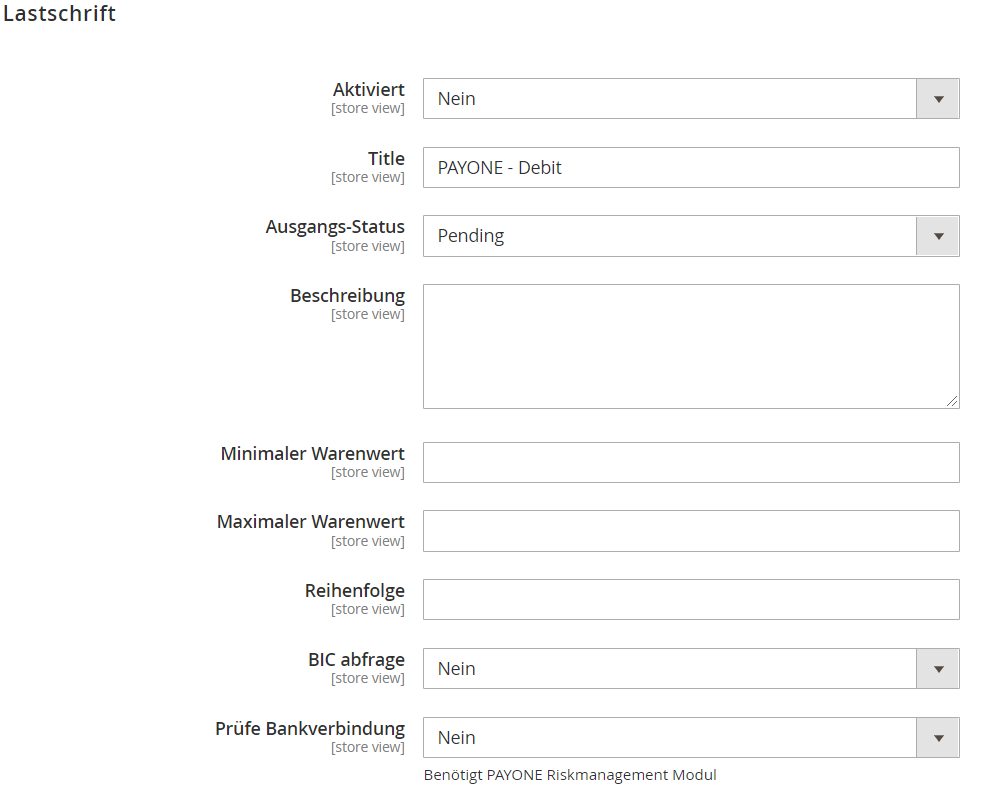
| Field | Description |
|---|---|
| Request BIC | Toggles whether the BIC is queried in the checkout. Use this configuration for better compatibility with bank accounts from outside DACH |
| Validate Bank Code | Turns on a bank account check using "bankaccountcheck" prompt.
This setting is part of our optional Risk Management Module
|
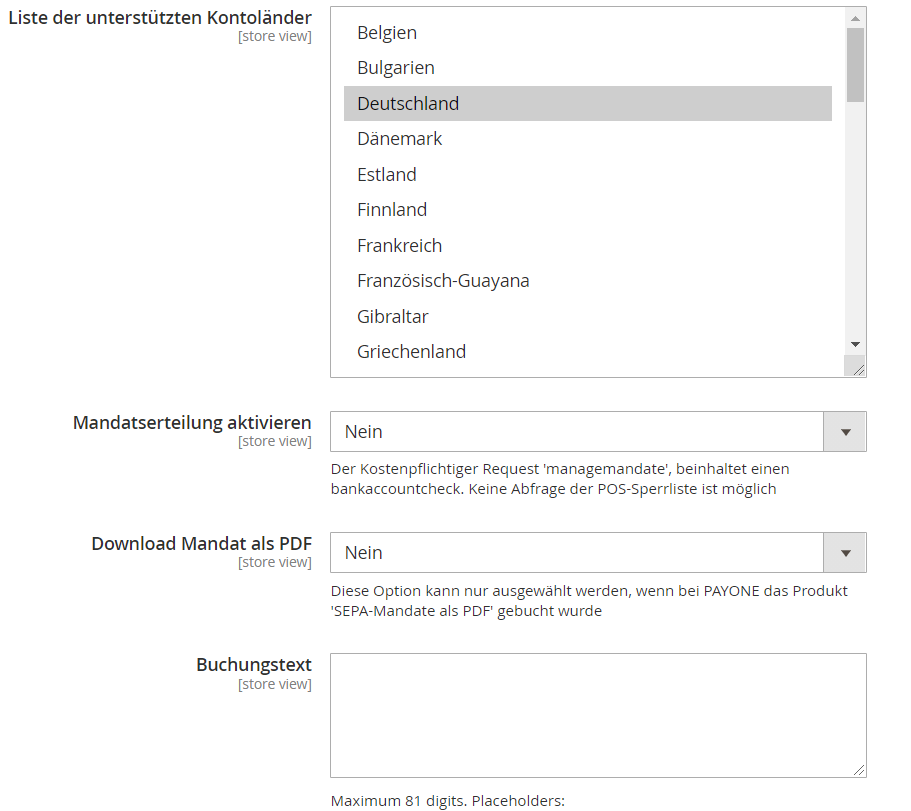
| List of supported SEPA countries | Multiple selection of the countries from which the payment type debit memo is supported. The PAYONE platform currently only supports direct debits for German bank accounts. |
| Mandates enabled | Select Yes / No. Should the SEPA mandate manager be used? A check of the bank details is obligatory. A check against the POS lock list is not possible. |
| Mandates download enabled | Select Yes / No. If Yes is selected, a link is offered after the order has been placed, via which the end customer can download the SEPA Mandate as a PDF file. |
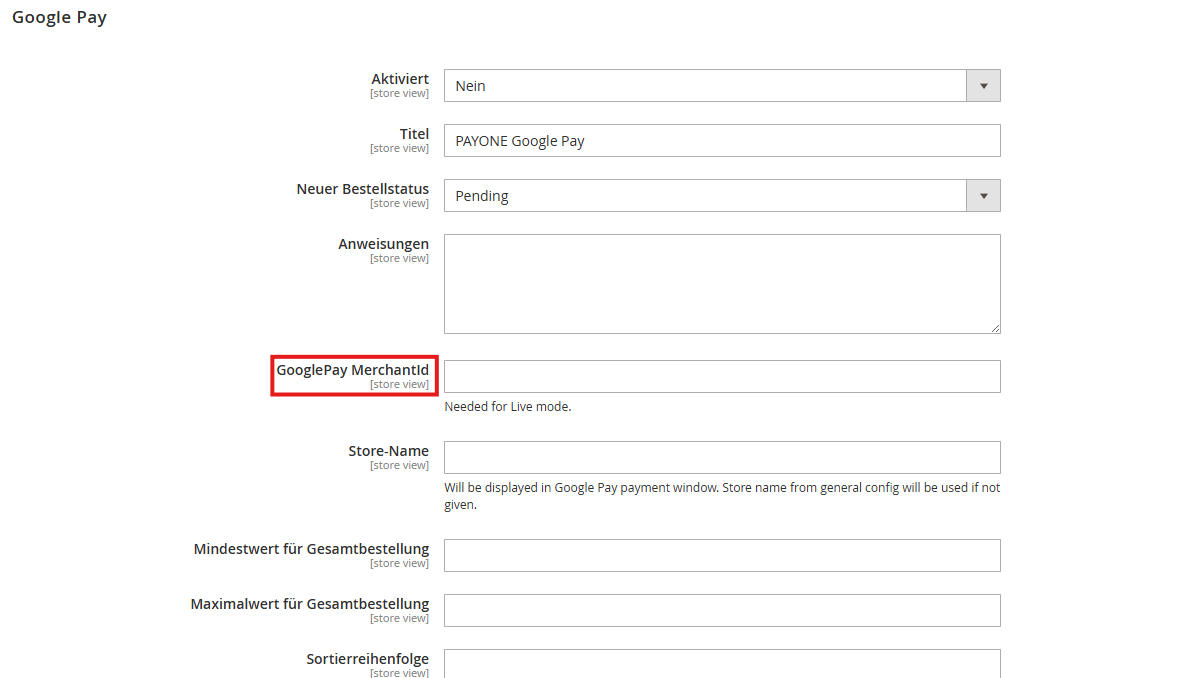
In the test system, there is no need to enter a "GooglePay MerchantId" in the GooglePay settings. However, when moving to the live environment, the merchant's "GooglePay MerchantId" must be entered here.
You can find your merchant ID at the top of the Google Merchant Center.
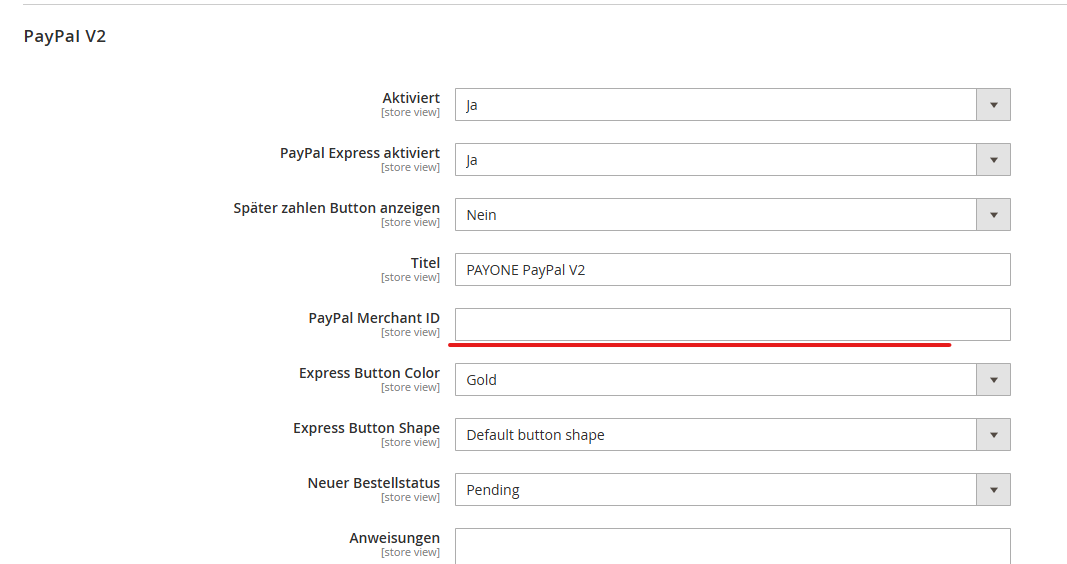
In the test system, there is no need to enter a "PayPal Merchant ID" in the PayPal V2 settings. However, when moving to the live environment, the merchant's "PayPal Merchant ID" must be entered here.
You can find a detailed description of where to locate your PayPal Merchant ID in your PayPal account.
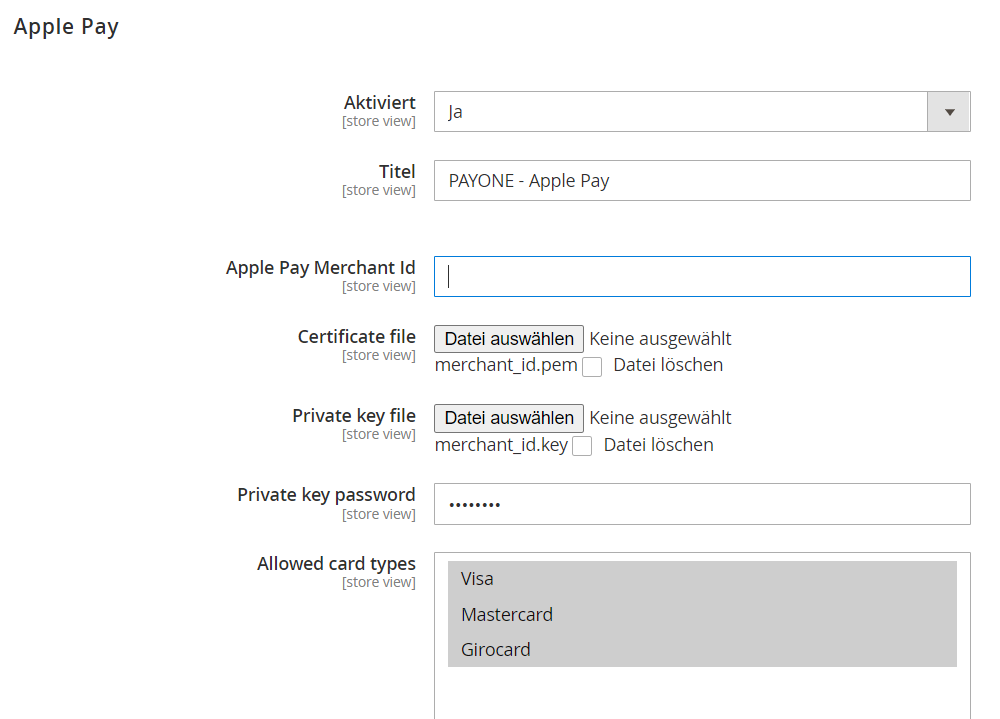
| Field | Description |
|---|---|
| Enabled | Yes/No |
| Title | Name of the payment method, which appears in the checkout |
| Apple Pay Merchant Id | This value can be taken from the Apple Developer Portal as "Identifier" of your Merchant ID: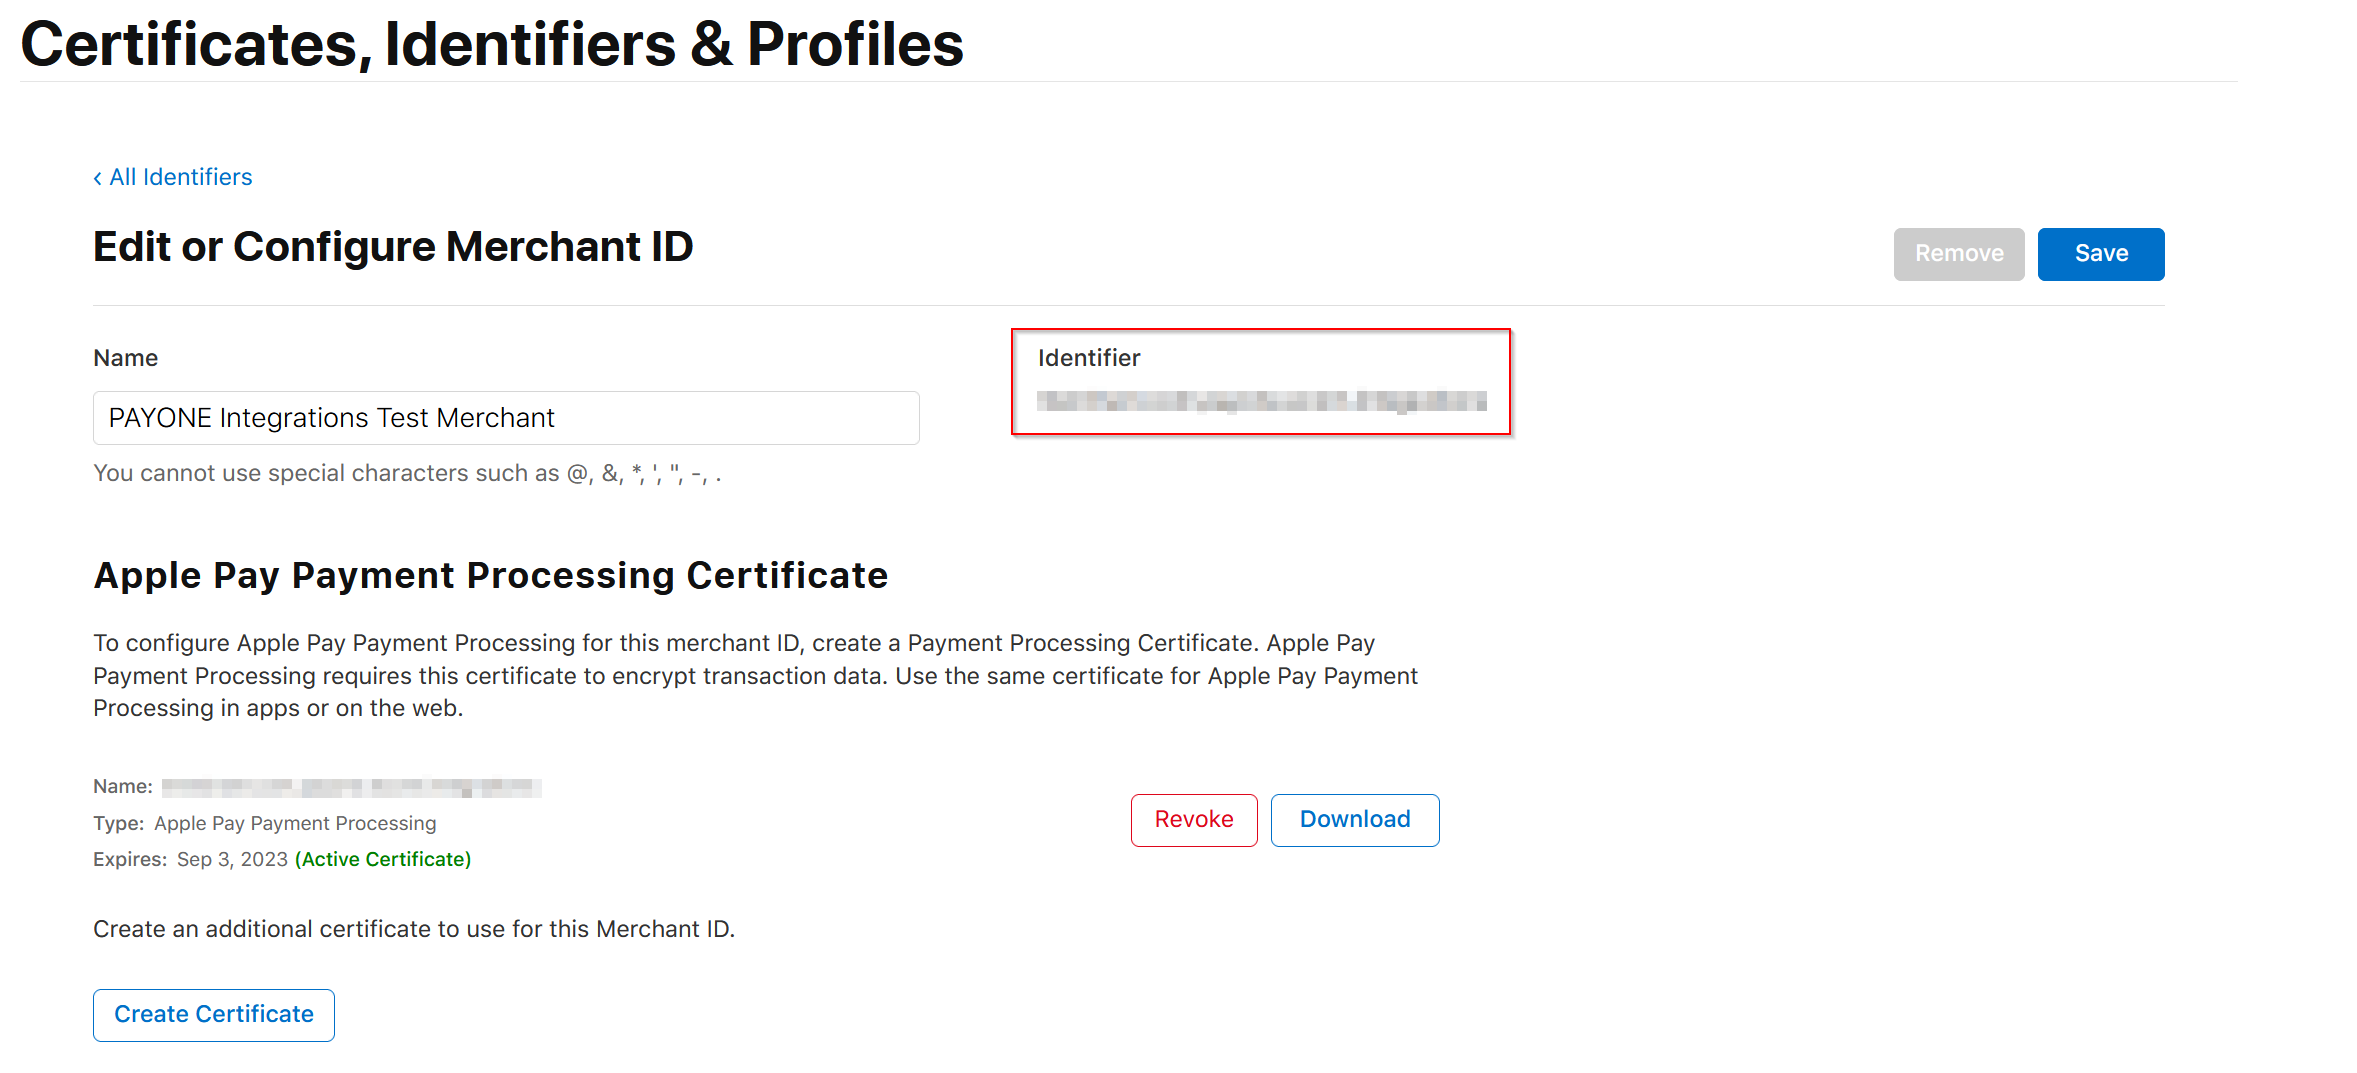 |
| Certificate file | Please upload your Merchant Identification Certificate from the Apple Developer Portal in .pem format. You can convert the merchant_id.cer file to .pem with this console command: openssl x509 -inform der -in merchant_id.cer -outform pem -out merchant_id.pem
|
| Private key file | Please upload the private key file used to create the Apple Pay CSR here. |
| Private key password | Here you can set the password for using the private key |
| Allowed card types | Select here the card types that are allowed for Apple Pay. Please only select the card types here that are also part of your PAYONE contract. |
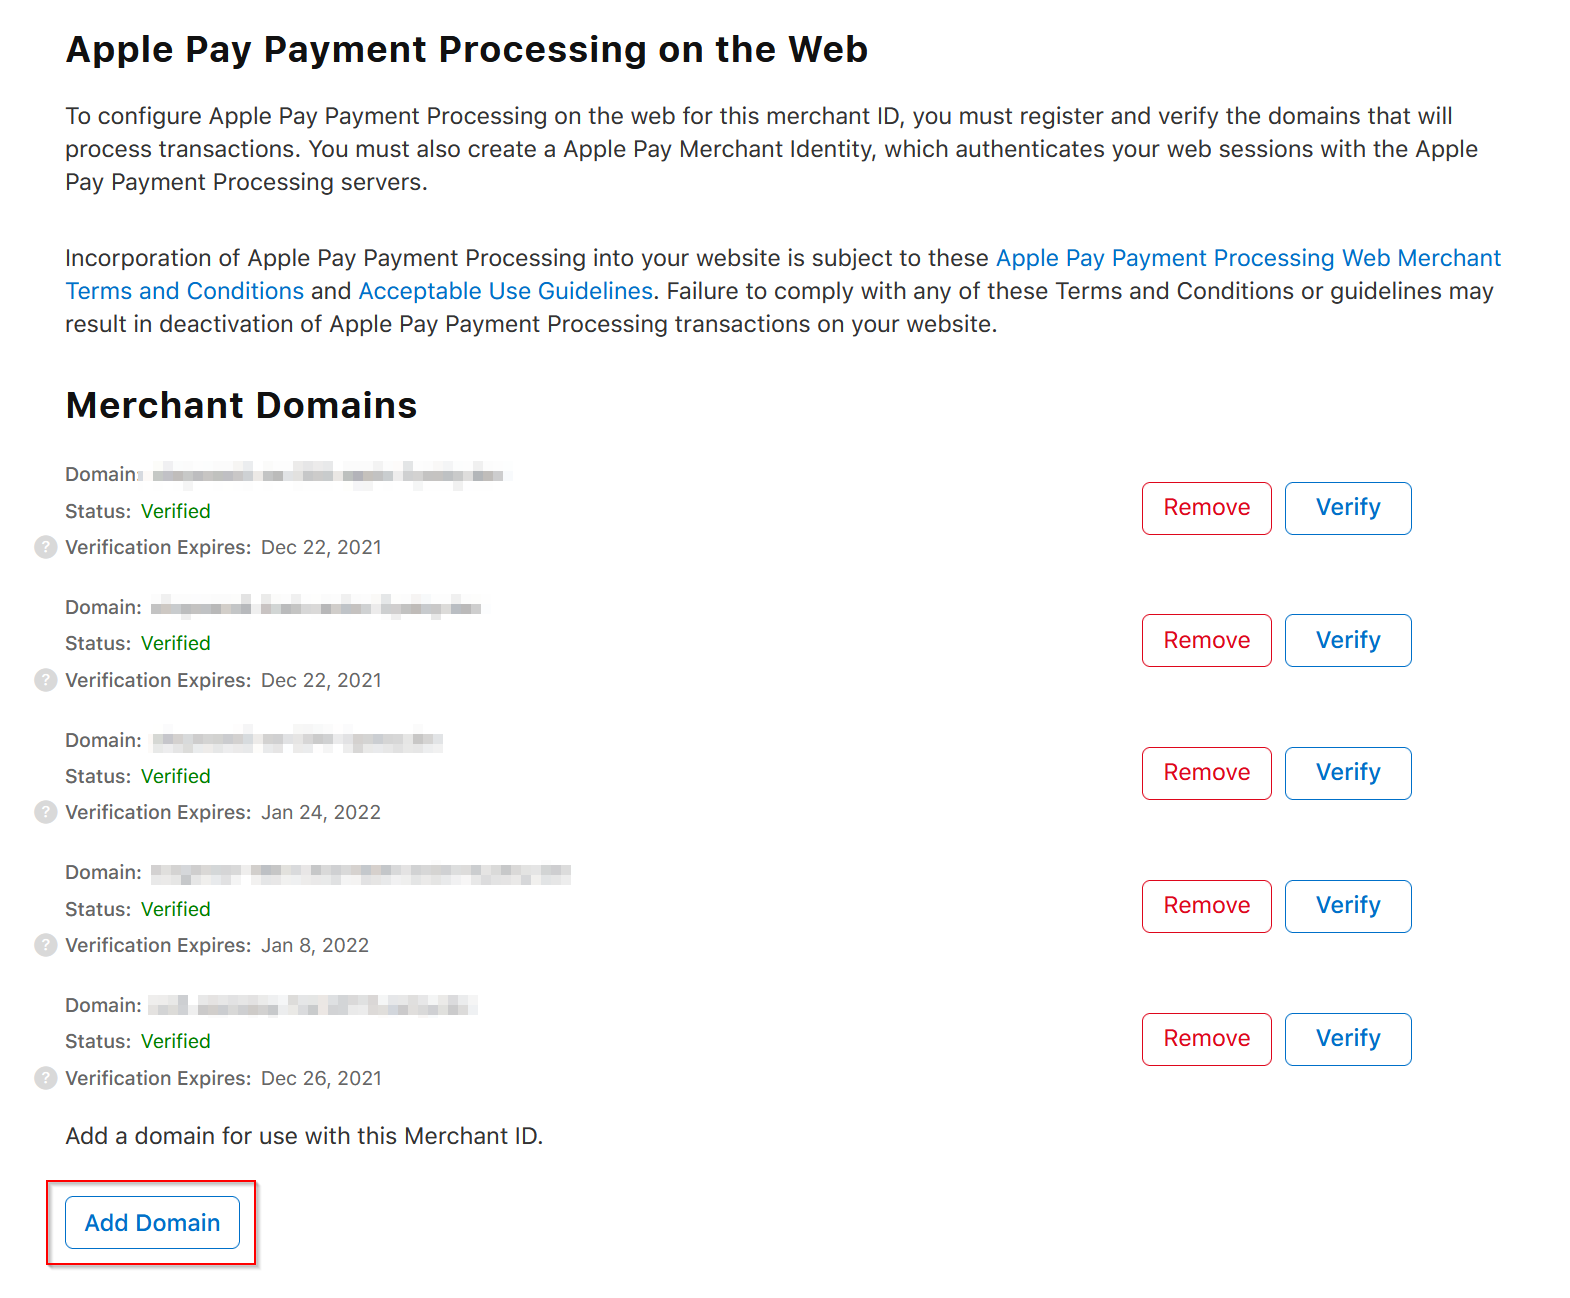
In addition to the configuration in Magento, it is also necessary to set up the corresponding certificates to operate Apple Pay as a payment method. You can find instructions for this here: Special Remarks - Apple Pay
Additionally, Apple requires validation of the store domain for Apple Pay. To do this, follow the instructions in the Apple Developer Portal:
Order Management
Click on PAYONE → Orders
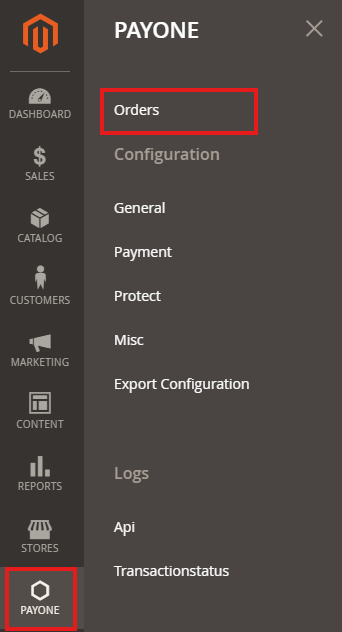
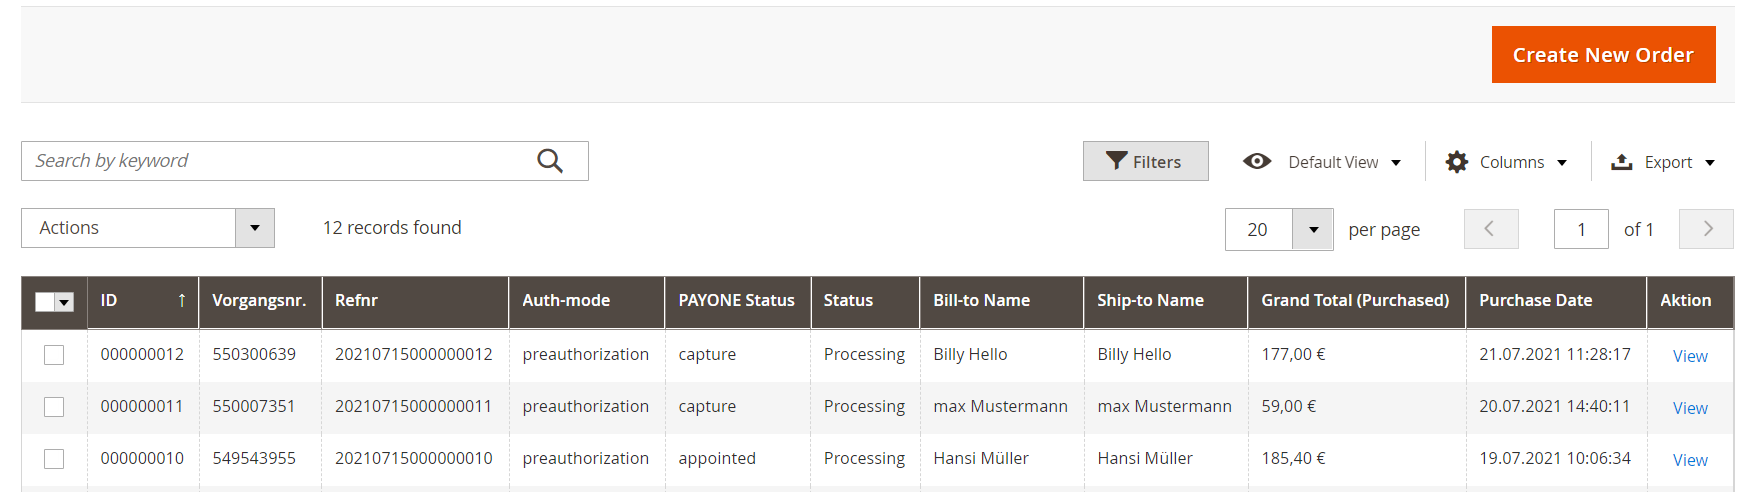
Here you will find a PAYONE-specific order overview similar to the Magento order overview. In addition to the standard information, you can view the payment status on the PAYONE platform, the exact type of payment (e.g. credit card brands) and, if applicable, the dunning status. A click on View opens the detailed view of the corresponding order.
Preauthorized transactions have to be captured in order to trigger the actual cash flow. The PAYONE Plugin handles this step during creation of the invoice for a given order. Under PAYONE → Orders → Order view → Invoices you can trigger the capture with the invoice creation.
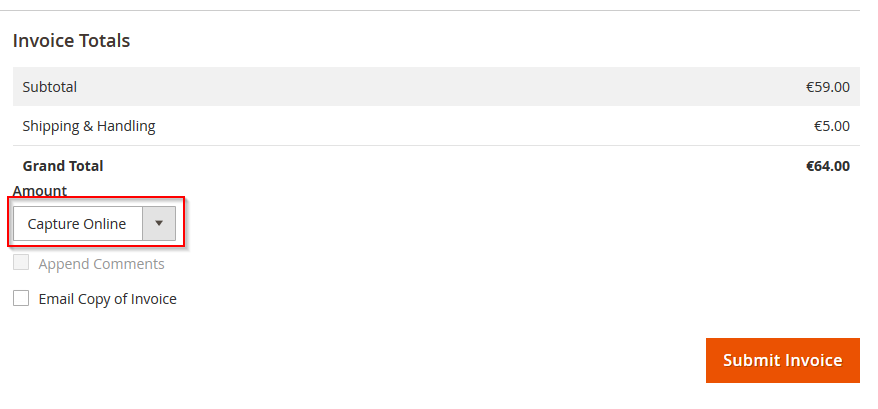
By selecting "Capture Online" in the dropdown list shown above, the debt will be collected on the PAYONE platform. If you do not want to capture the money but still want to create an invoice and receivable, please select "Capture Offline" instead.
Partial captures are also possible by simply adjusting the billable quantity of the items.
Already captured funds can be returned by creating a credit memo for an existing invoice.
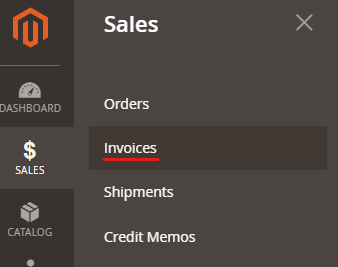
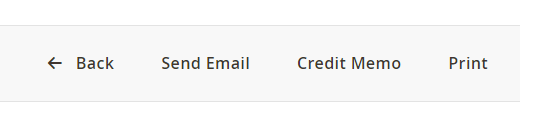
Open the invoice details of the invoice to be credited. Click on Credit Memo in the upper right corner.
Enter here the amount to be refunded:

By selecting the "Refund" Button here, Money is sent back to the customer's payment method. "Refund Offline" will create the credit memo, but won't trigger any cash flow.
Partial refunds are possible using the same method as with partial captures. You can also adjust the sum of the refund to account for fees during the refund, but keep in mind that some payment methods rely on cart items to match with the initial order.
Extended Configurations
Here you will find separate setting options that allow you to customize our plugin more precisely to your needs.
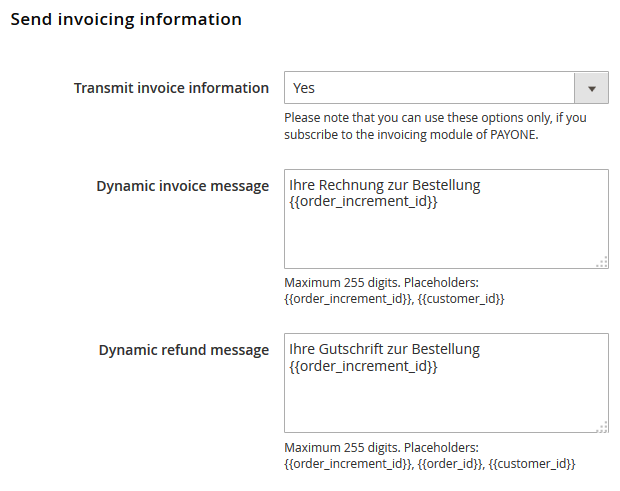
Click on PAYONE → General → Send invoicing information activate the transmission of item data to create an invoice on the PAYONE platform.
The text can be freely selected and appears as dynamic text on the invoice or credit note. Various Magento variables can be used as placeholders.
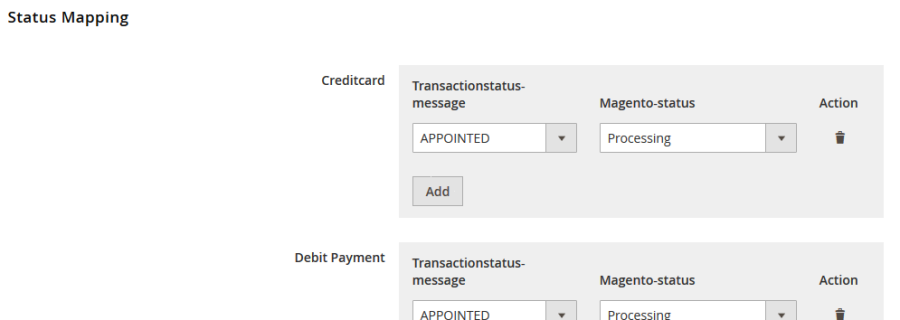
Click on PAYONE → General → Status Mapping the different transaction statuses of the PAYONE platform can be mapped to Magento order statuses. If a new transaction status is received, the corresponding "Magento status" is set in the order overview in the Magento backend. This can be entered separately for each payment type.
Click on PAYONE → General → Payment Creditcard → Input configuration → Custom styling hosted-Iframe
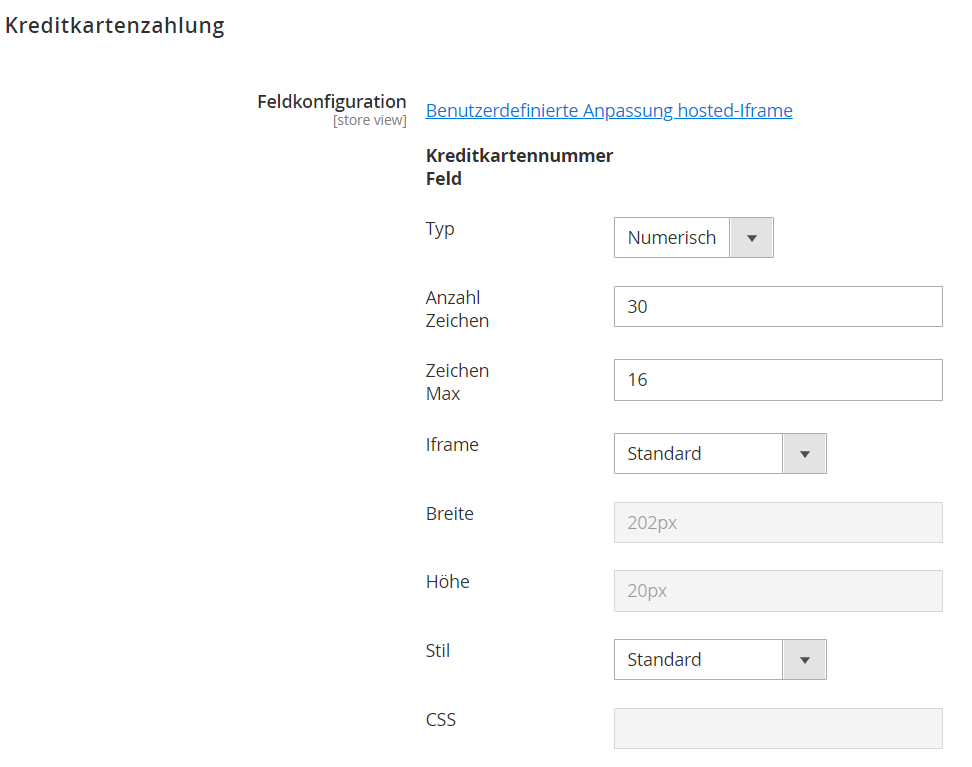
| Field | Description |
|---|---|
| Active | Yes/No |
| Digit-count | Length of the field in characters (HTML attribute size) |
| Width | CSS - Specifies width |
| CSS | Specification of CSS properties for field Deactivated with previous selection of Standard |
| Height | CSS - Indication of height |
| iFrame | Standard - Uses width and height from standard style Custom - Uses width and height from the following fields |
| Language | Select the language in which the error message is to be output. |
| Standard-style | Input - CSS specification for all input fields (HTML input) Selection - CSS specification for all selection fields (HTML select) |
| Style | Standard - Uses CSS specification from Standard Custom - Uses CSS specification from the following field |
| Type | Numeric - Only numbers are allowed and for mobile devices the numeric keyboard is used input type="tel" Password - input type="password" Text - input type="text" |
| Max-digits | Maximum length of input (HTML attribute maxlength) |
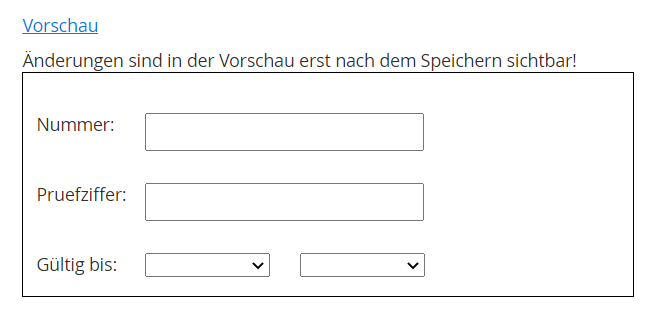
Preview
At this point you can see how the appearance looks according to the previous setting of the credit card payment method in Checkout.
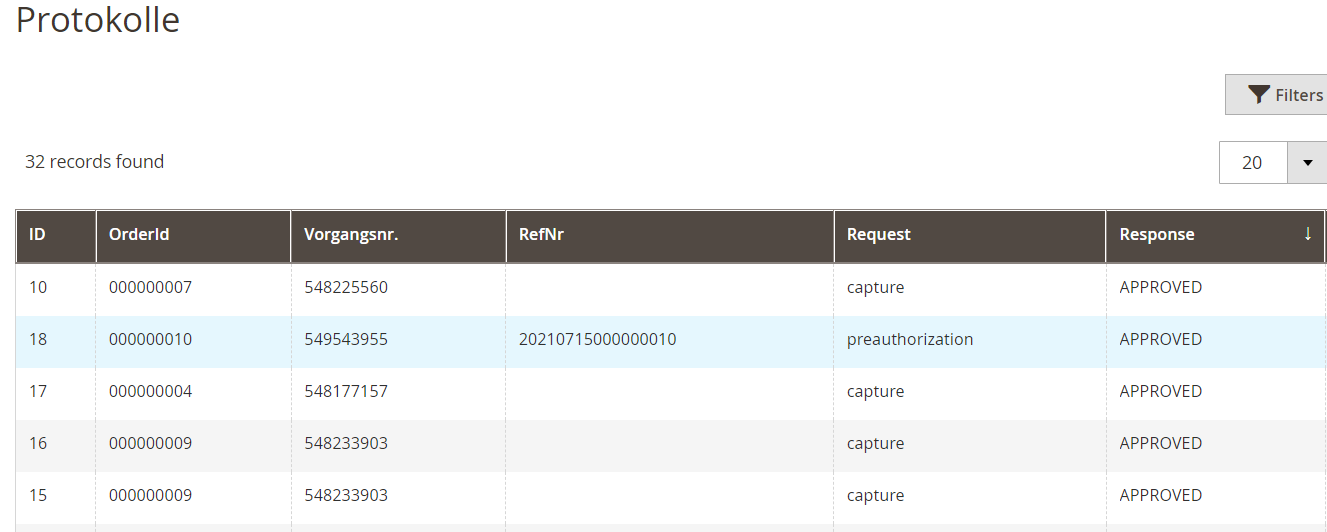
Click on PAYONE → Logs
In the Logs section you can find all the information about the processed payments and communication with the PAYONE platform.
API Logs
In this overview you will find all requests from the Magento shop to the PAYONE platform as well as the answers of the PAYONE platform to these requests. Only the requests that were transmitted to the PAYONE platform via Client API are not listed in this overview.
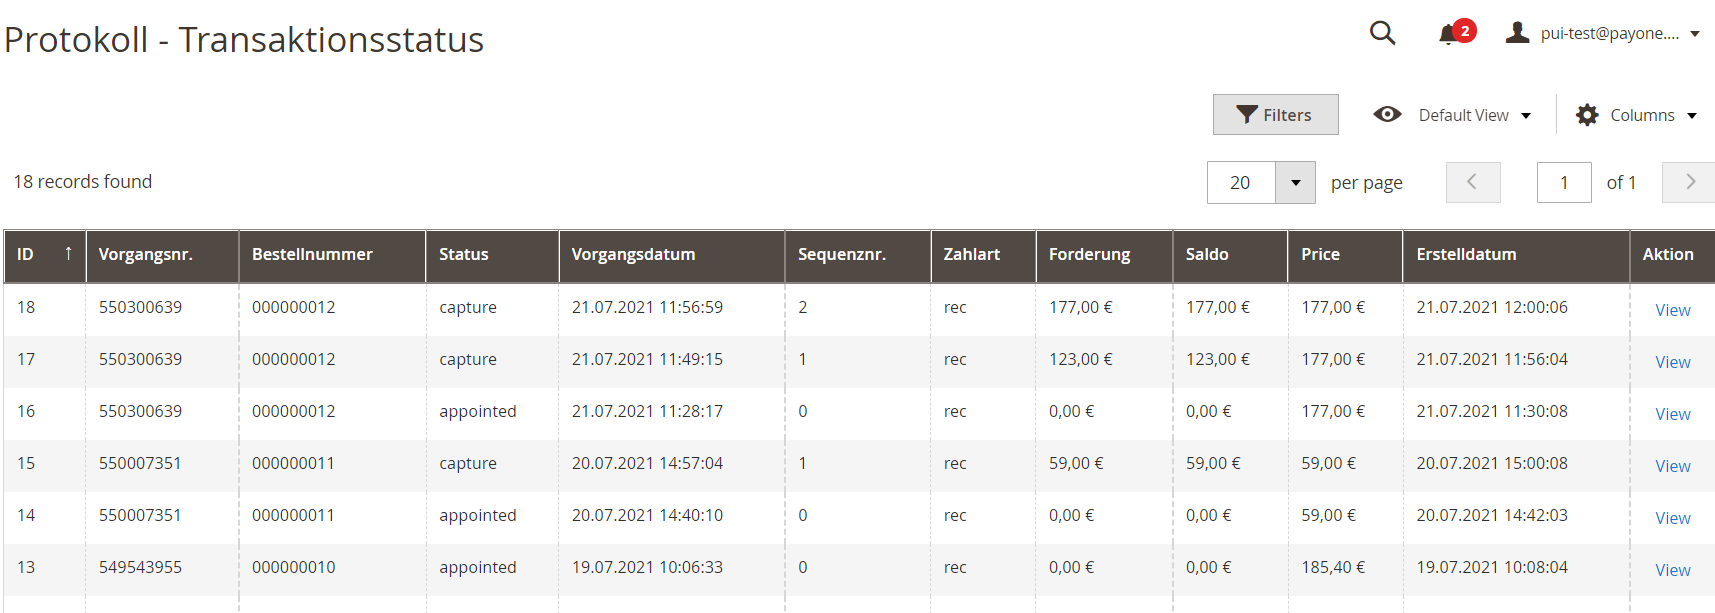
Transaction Status Logs
The Transactions submenu item displays Magento received transaction status notifications for each order and transaction. These notifications are sent from the PAYONE platform to your shop.