Integration
- Integration
- Plugins
- Integration Guide Shopware 6
- Integrationsanleitung Shopware 6
- Integration Guide Magento 2
- Integrationsanleitung Magento 2
- Integration Guide Shopware 5
- Integrationsanleitung Shopware 5
- Integration Guide WooCommerce
- Integrationsanleitung WooCommerce
- Integrationsanleitung Oxid 6
- Integration Guide Oxid 6
- Integrationsanleitung Oxid 7
- Integration Guide Oxid 7
- Installationsanleitung Magento 1
- Integration Guide Magento 1
- Channel-Server-API
- Server API - Preauthorization
- Server API - Authorization
- Server API - Capture
- Server API - Refund
- Server API - Debit
- Server API - Managemandate
- Server API - Getinvoice
- Server API - Getfile
- Server API - Vauthorization
- Server API - Creditcardcheck
- Server API - Getuser
- Server API - Updateuser
- Server API - 3dscheck
- Server API - Bankaccountcheck
- Server API - Addresscheck
- Server API - Createaccess
- Server API - Updateaccess
- Server API - Updatereminder
- Server API - General Interface Definitions
- Server API - checkout demo app
- Channel-Client-API
- Client API - Preauthorization
- Client API - Authorization
- Client API - Creditcardcheck
- Client API - Managemandate
- Client API - General Interface Definitions
- Client API - Createaccess
- Client API - Vauthorization
- Client API - Bankaccountcheck
- Client API - AJAX-Mode
- Client API - Redirect-Mode
- Client API - Addresscheck
- Client API - Hosted iFrame Mode
- Client API - Calculation of the HASH value
- PAYONE Link
- Channel-Frontend
- Response Handling
- Testdata
- NEW Hosted Tokenization Form
- Plugins
Shopware 6 Integration Guide
Introduction
Our Shopware 6 plugin is regularly updated and provides a versatile, ready-to-use solution for easy online payment acceptance.
Supported Payment Methods
💳 Credit Cards
- Visa (Click to Pay), Mastercard (Click to Pay)
- American Express
- JCB, Diners Club
📱 Digital Wallets
- Apple Pay
- Google Pay
- Amazon Pay (v2)
- PayPal and PayPal Express
- PayPal v2 and PayPal Express v2
- Alipay
- WeChat Pay
- WERO
🏦 PAYONE Solutions
- PAYONE Secure Invoice
- PAYONE Secured Payments
- PAYONE Direct Debit
- PAYONE Open Invoice
- PAYONE Prepayment
🌍 Local Payment Methods
- Klarna Payments
- Ratepay Solutions
- Unzer Payments
- Bancontact, EPS, iDEAL
- PostFinance, Przelewy24
Requirements
Plugin Installation
You have 2 ways to install our plugin:
Installation directly via Shopware 6 Admin
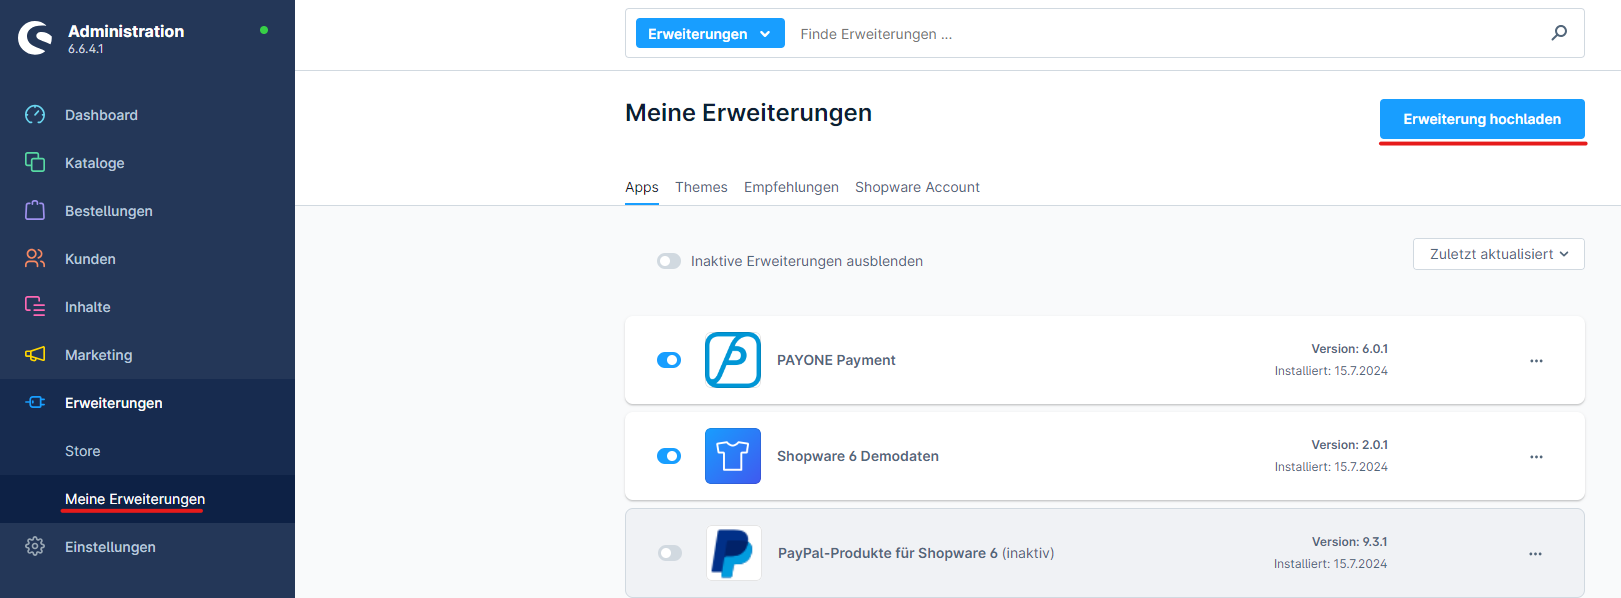
- Download our latest plugin from GitHub
- You can upload the plugin under Extensions → My extensions → Upload extension
- Install and activate the plugin
Installation via Composer
Execute the following commands in your Shopware directory:
Portal Configuration
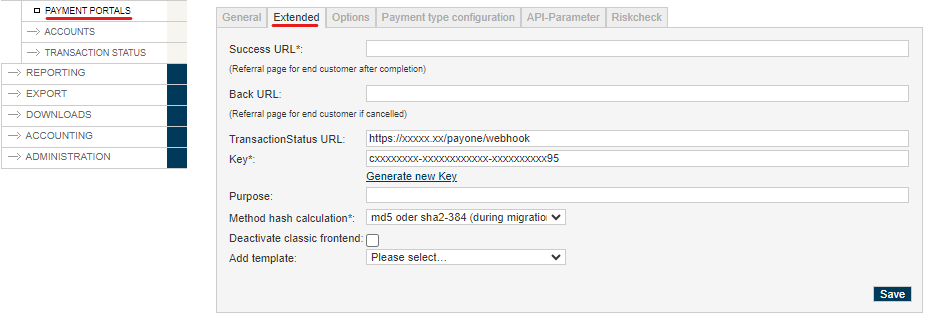
To send the transaction status to the correct address, please log in to the PAYONE Merchant Interface (PMI).
Navigate to: Configuration → Payment Portals → YOUR_PORTAL → Advanced → TransactionStatus URL
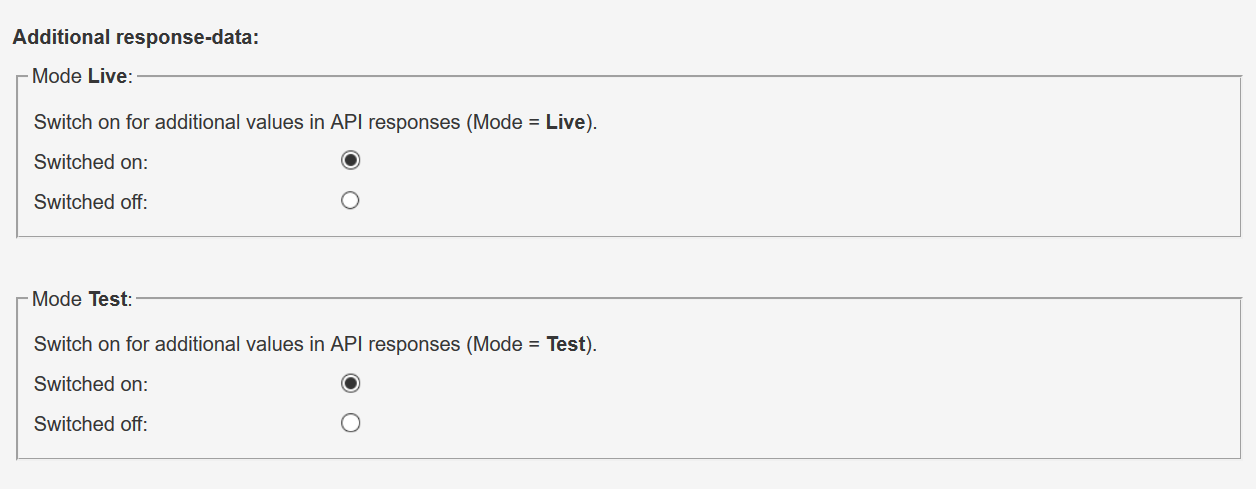
Additional Response Data
Under General, set the Additional Response data for both Live and Test modes to "on".
Shop System - Admin Configuration
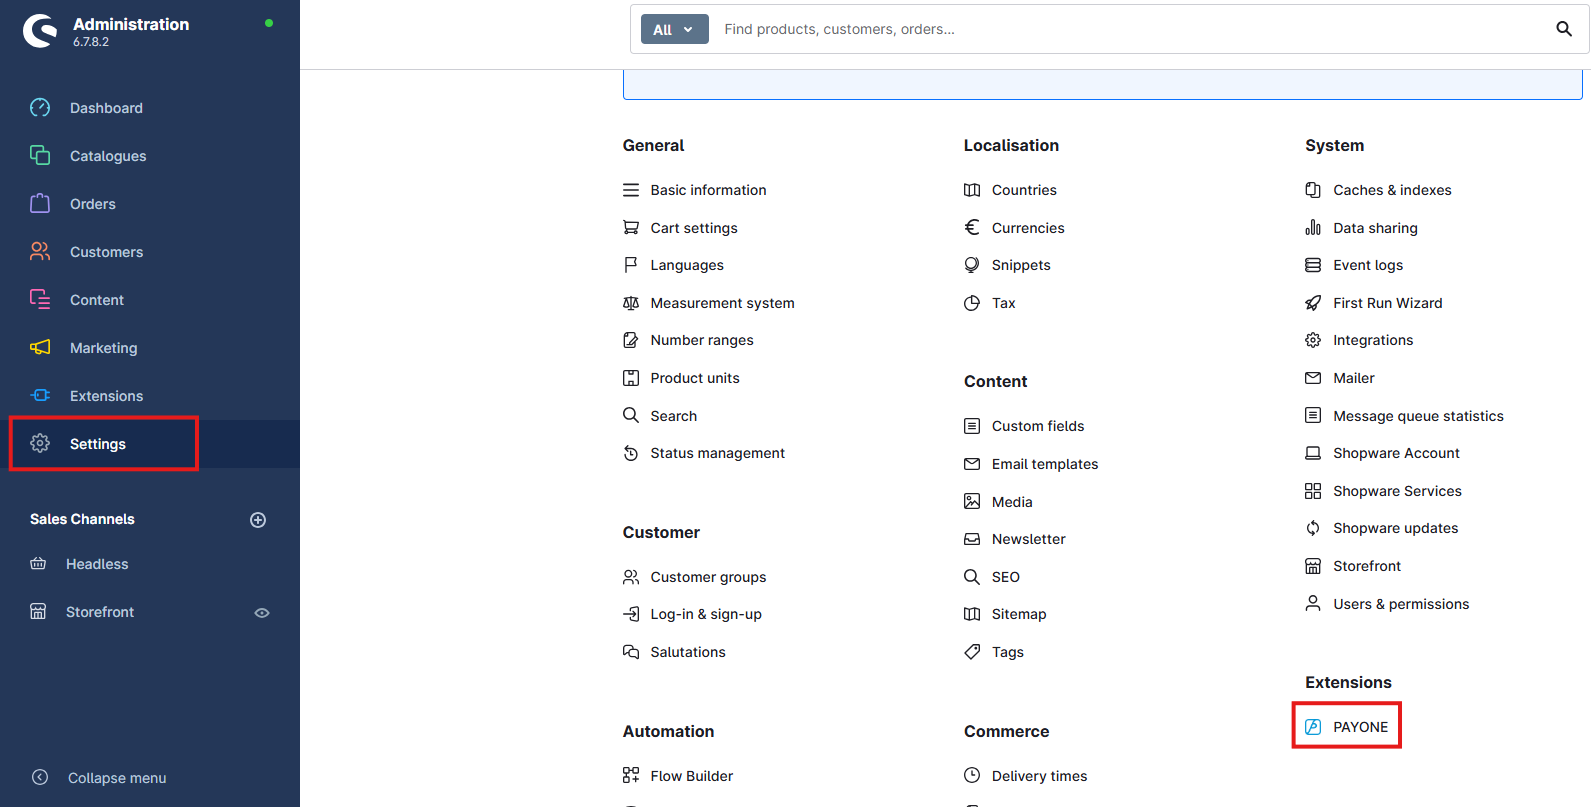
Click on Settings → Extensions → PAYONE
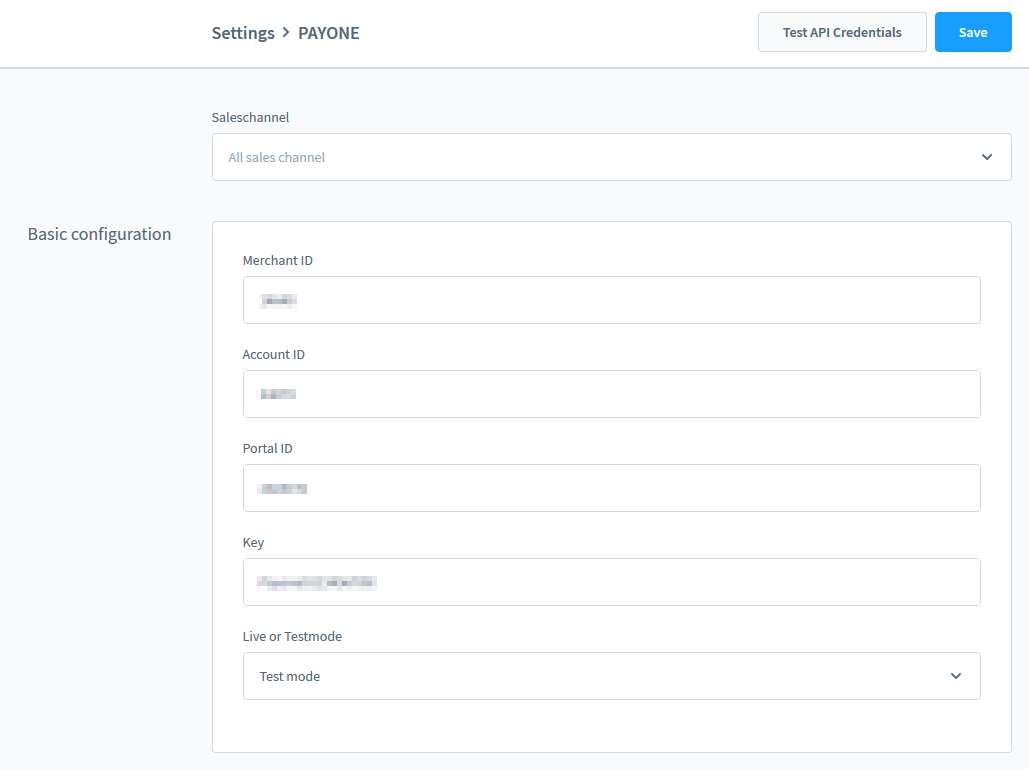
Enter Access Data
Please enter your access data here:
Activate Sales Channels
Please activate under Sales Channels → [used Sales Channel] → Payment and shipping the payment methods for your used sales channels:

Each payment method can be used with separate access data. These can be entered directly in the payment method.
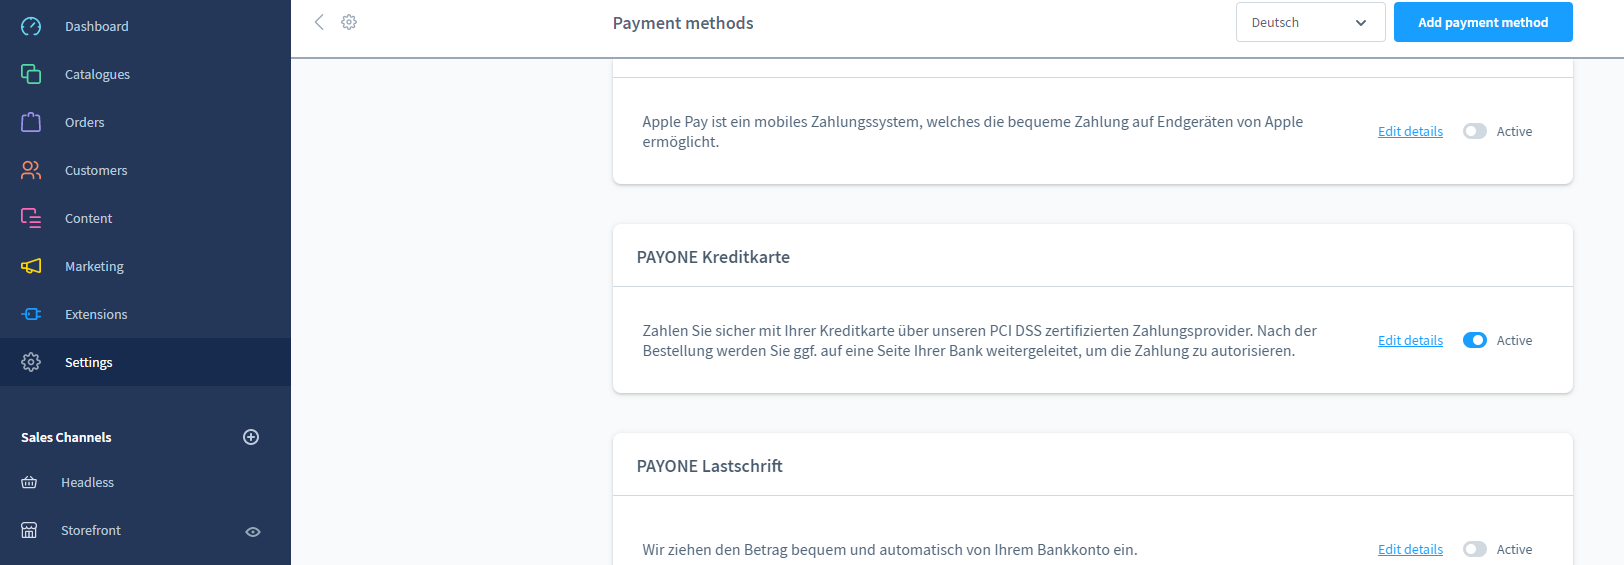
Payment Methods Setup
Activate the requested payment methods under Settings → Shop → Payment methods
Special Adjustments
This payment method requires its own payment portal. Please enter a separate portal ID under Settings → Extensions → PAYONE → PAYONE Secure Invoice.
A rule created during the plugin installation for the Rule Builder ensures that the payment method can only be used for the currency "Euro". If you have not installed the currency "Euro" in your store during the plugin installation, a random, non-existing currency ID will be linked to the condition, so that the rule will always fail. If you then create the currency "Euro" afterwards, you have to select the currency "Euro" in the condition "Currency is one of" under Settings → Rule Builder → Payone secure invoice.
To inform their customers of the bank account details to which they should transfer, a bank details block was integrated into the invoice template.
To be able to offer Unzer, the payment methods must be additionally configured in the backend:
PAYONE Unzer Invoice Purchase
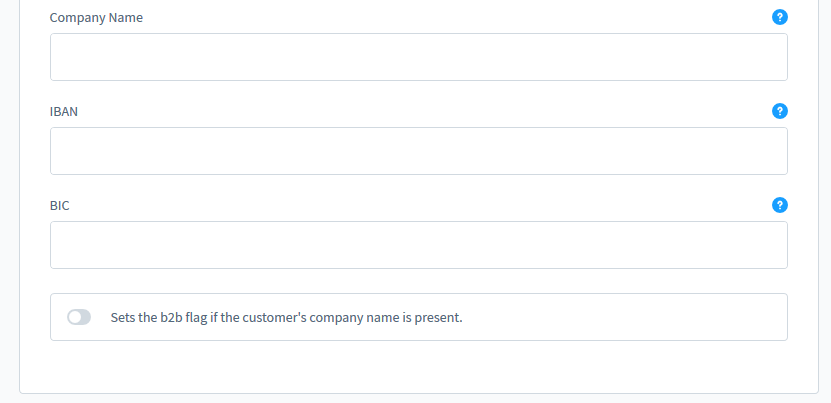
Under Settings → Extensions → PAYONE → PAYONE Unzer Invoice Purchase the following data must be stored: Company name (for the supplementary T&C), IBAN and BIC (both will be displayed next to the payment reference). Activate the B2B slider if you want to accept B2B orders.
PAYONE Unzer Installments
Under Settings → Extensions → PAYONE → PAYONE Unzer Installments the following data must be stored: Company name (for the supplementary T&C), channel name and channel password (both you get from Unzer).

In Settings → Extensions → PAYONE → PAYONE Apple Pay the following data must be provided: Supported card types, Apple Pay Merchant ID (Identifier in the Apple Developer Portal), Apple Pay Display Name (the name shown on the Apple Pay sheet), and Certificate Passphrase (if a password was set during the request.csr creation).
Create the following files in the config/apple-pay-cert/ folder: merchant_id.pem and merchant_id.key.
In addition, a subfolder .well-known must be created in the public folder. In this subfolder please put the file: apple-developer-merchantid-domain-association.txt

In addition to the configuration in Shopware, it is also necessary to set up the corresponding certificates to operate Apple Pay as a payment method. You can find instructions for this here: Special Remarks - Apple Pay
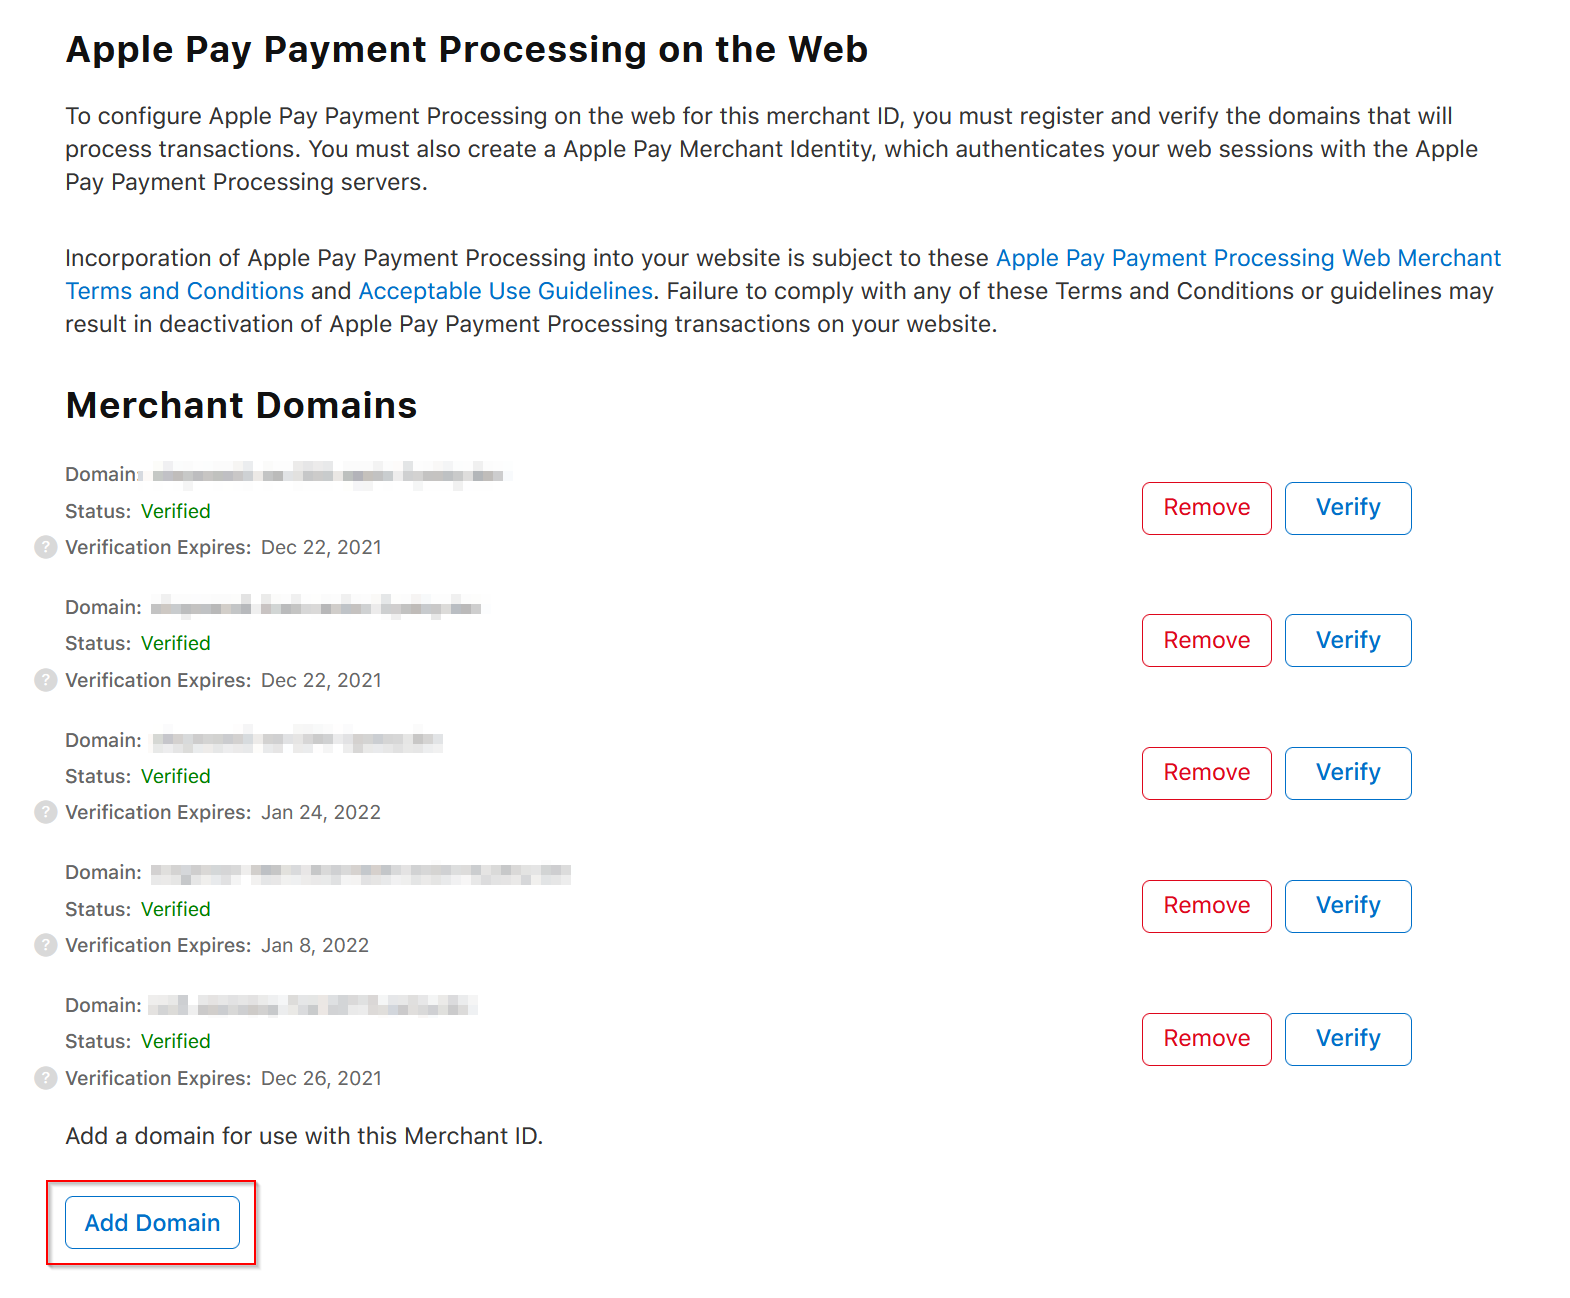
Additionally, Apple requires validation of the store domain for Apple Pay. To do this, follow the instructions in the Apple Developer Portal:
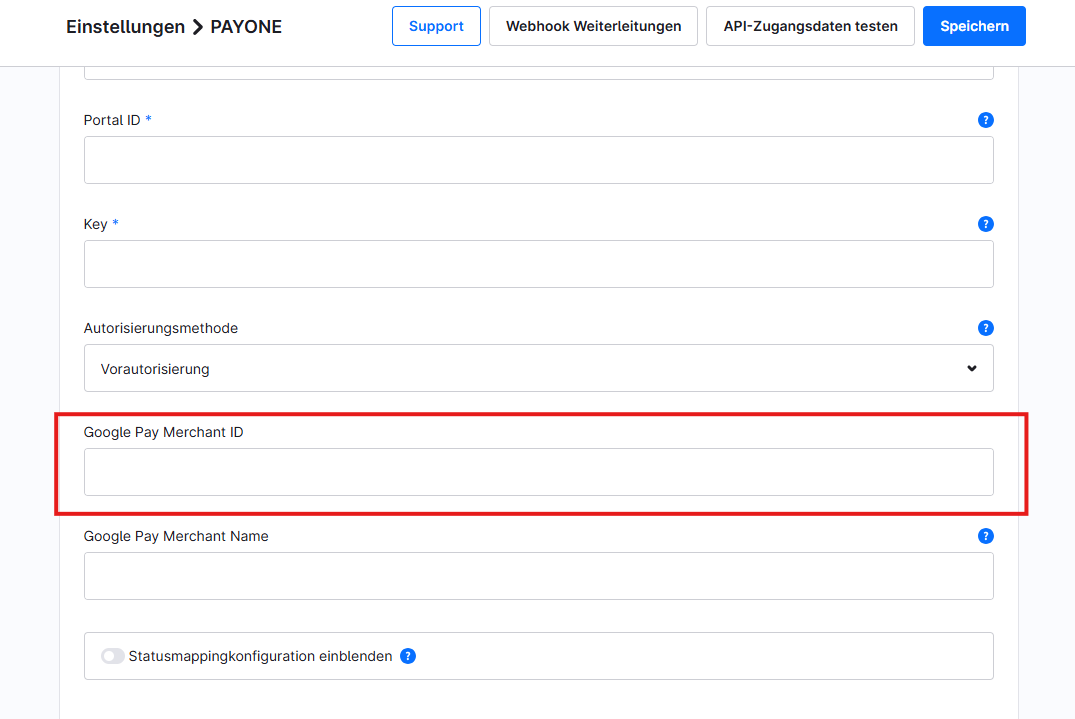
In the test system, there is no need to enter a "GooglePay MerchantId" in the GooglePay settings. However, when moving to the live environment, the merchant's "GooglePay MerchantId" must be entered here.
You can find your merchant ID at the top of the Google Merchant Center.
Order Management
The PAYONE plugin sets the payment status of an order according to the set status assignment.

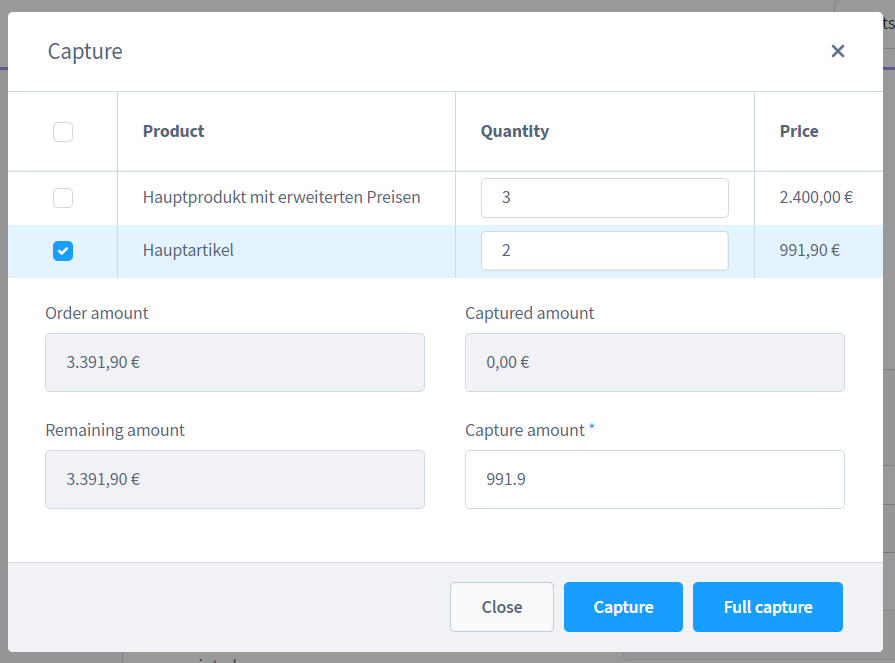
Preauthorized transactions can be captured using the "Capture" button in the order details.

The "Refund" button can be used to refund an order (in the "paid" status).

You can partially capture or refund an order by selecting an order item and editing the quantity. The capture amount is adjusted dynamically.
If you want to fully capture or refund the order, click "Complete Capture".
You can also directly enter the requested amount in the "Capture amount" field.
Captures and refunds are only possible after the store has received a transaction status for an order, therefore, the buttons for captures and refunds are grayed out directly after an order.
Extended Configurations
Under Settings → Extensions → PAYONE → Status Mapping you can individually assign the states to which the orders should be set as soon as the respective information is sent by the PAYONE platform.
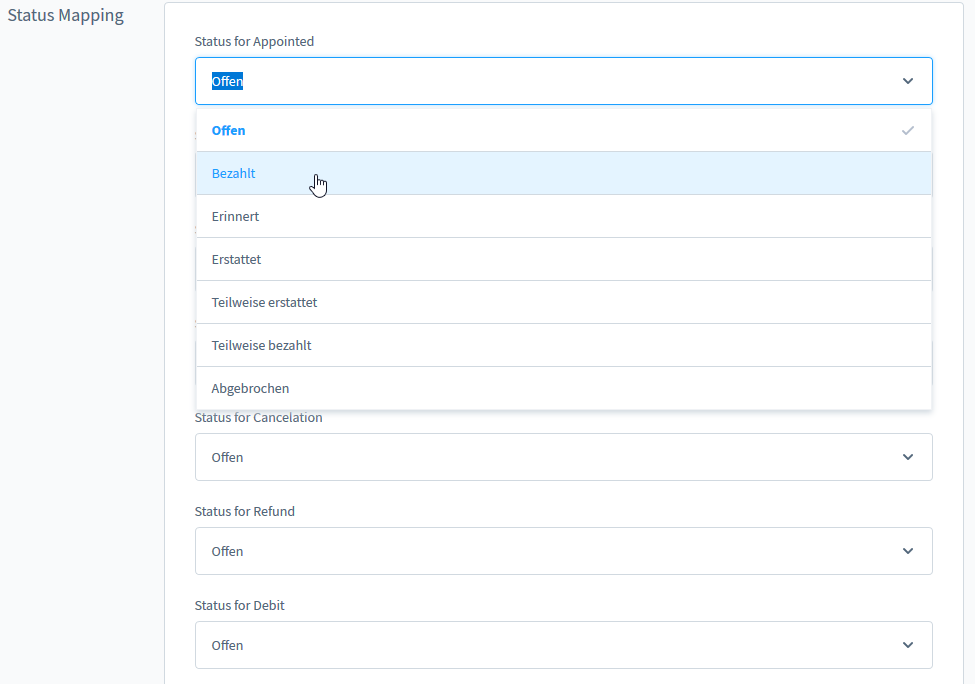
Under Settings → Extensions → PAYONE you can individually assign the states for every payment method separately. Please choose the payment method and activate "Display state mapping configuration".

The following customizations are not necessary to offer credit card payments. The possibility to customize the payment type visually in the frontend is described in the following:
You can change the CSS by creating a new plugin that depends on this plugin via Composer. Here you can then define an overriding JavaScript plugin like this one:
Then you can register the overriding plugin in your custom/plugins/MyPlugin/src/Resources/storefront/main.js:
If you use Shopware's rights management, please give permission to all users. Under Settings → System → Users & permissions → Role create a new role or update an existing role. Activate the PAYONE transaction management right.